Update 2020 Please note the 2nd front end strip down was in 2011 and then the 3rd massive front end strip,
down was in 2019 when the new TCI custom IFS and comprehensive cooling package were fitted.
This page is, however, very important as it shows how a clean fire wall was prepared which was the basis for all engine
upgrades to follow. It also shows how an extra 2-inches of driver leg room was achieved by "podding" the firewall.
At the bottom of the page you can see the clean firewall when the truck was taken to the NEC show in Nov. 09
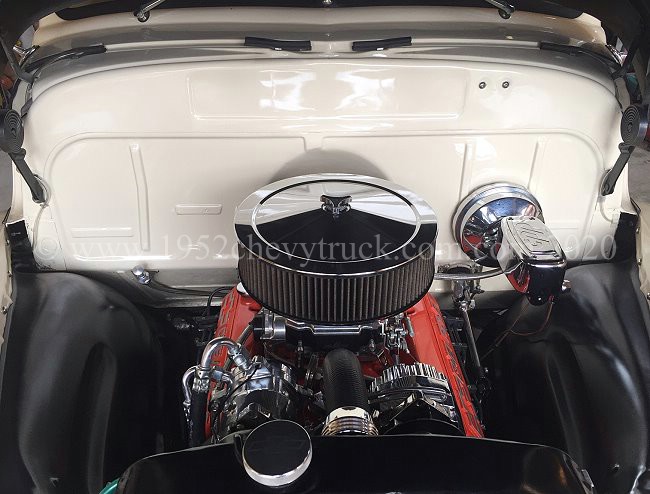
Also shown at the bottom of the page is the engine bay in 2020 which shows all of the improvements and how
this page detailing a clean firewall was so important. Further details can be seen in the 2020 "engine dress up"
September 2009. Introduction -
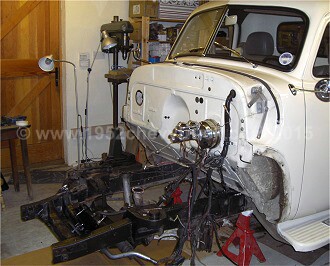
The front end strip down has started.
The inner and outer wings (fenders) have, so far, never been removed until now.
Aims,
To improve further the front suspension.
Re-fit the radiator correctly. It had not been fitted correctly by the previous owner / 1998 build.
Improve appearance of top of radiator with some mods and paint it.
Correctly fit rubber radiator mounts. (They were missing!)
Remove old (poorly made) engine mounts and manufacturer new stronger mounts.
Left side - re-route the air con pipes so make a cleaner inner wing.
Right side - re-route wiring to make a cleaner inner wing.
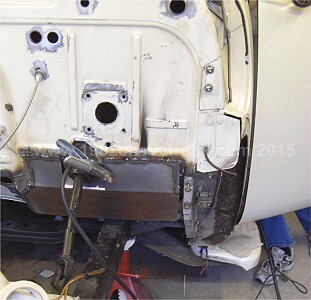
Repair and paint inner wings - Repair all areas where the "butchers" have cut them to fit the suspension.
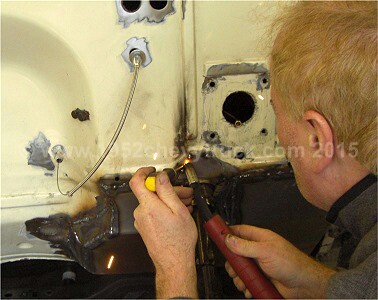
Firewall - re-route air con pipes and electrics to make a cleaner firewall.
Attend to all areas that need to be rebuilt properly and reduce rattles.
All parts to be re-fitted through Evo mastic and with stainless steel bolts.
Deadline - mid November for the British Classic Car Show at the NEC Birmingham UK.
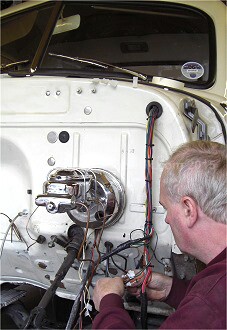
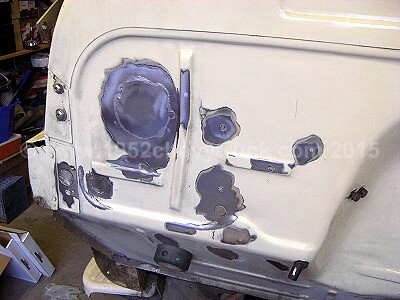
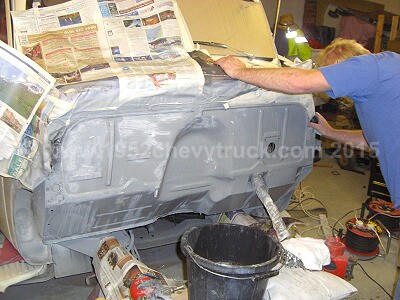
Untidy firewall. Holes and wiring.
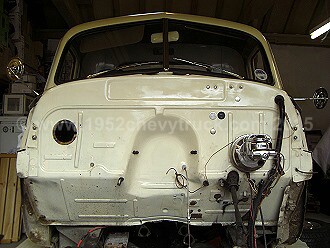
Scroll down the page to see the work continue on the firewall.
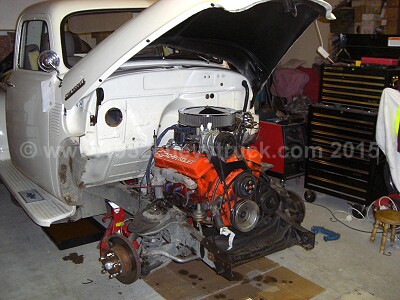
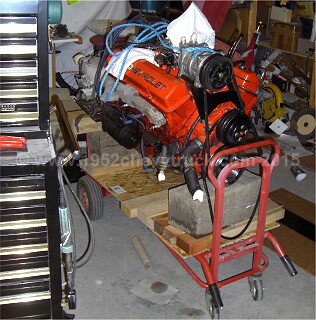
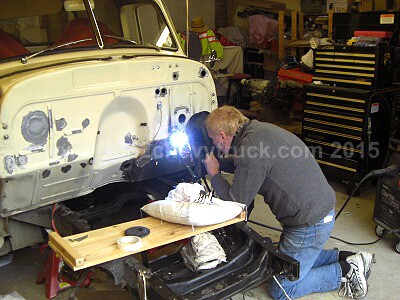
Engine and transmission removed. Sept 09.
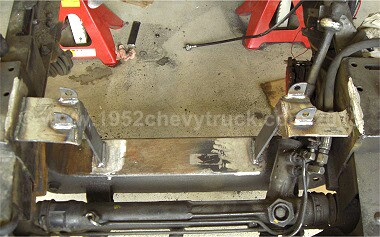
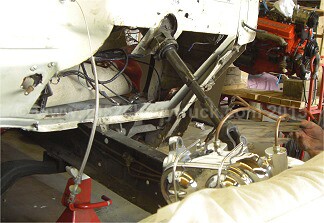
The outer and inner wings (fenders) were removed, the bumper, front grill and radiator and the air conditioning
pipes. The lower and upper suspension arms were also removed ready for the new arms to be fitted.
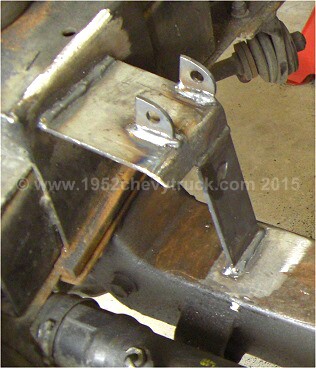
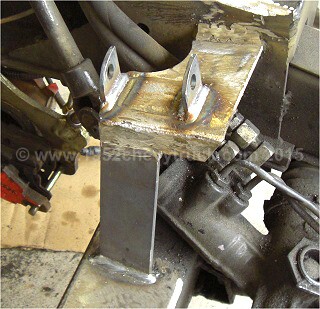
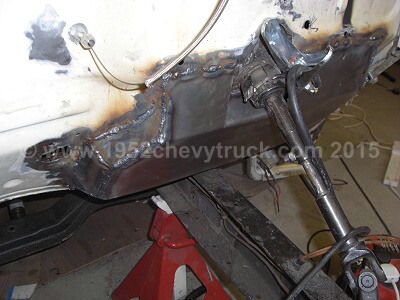
Improving the engine mounts. Oct 09
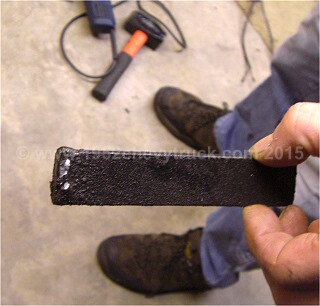
Notice the poor quality welds, the thin materials and from the right hand picture
Left hand mount below. Notice from the removed upright how much of the weld did not penetrate.
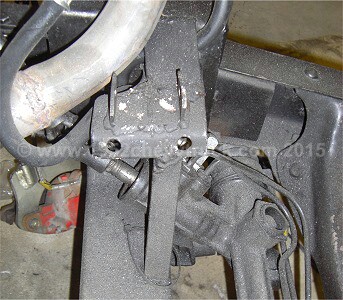
Below are the improved engine mount brackets. The engine mounts were fitted to these brackets.
Also compare above and below, the mounts are moved backwards a about 12mm.
This will provide a little more clearance between engine and radiator.
Update 2020. In 2019 it was discovered one of the engine mounts had failed and
they were replaced with improved engine mounts.
Untidy Wiring.
"Podding". Moving back the pedals to provide more leg room.
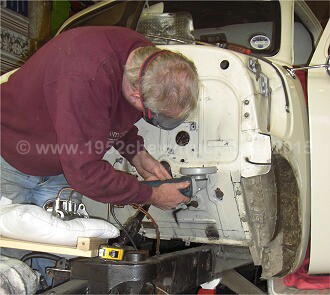


A great deal of effort was put into keeping the steering column as compact as possible and using a steering
wheel with a very shallow dish to provide more arm room and increase the distance from the seat to the
steering wheel. Here we are providing and extra 50mm (2-inches) of leg room. This effectively extends
the cab for the driver. These trucks have a short cab and this will lead to a more comfortable driving
position. It will also be necessary to modify the left hand inner wing (fender) to fit in with the
"podding". Actually when the pedals are moved forwards it may be possible to achieve an extra
3-inches but the left foot rest position will be 2-inches further back.
Update 2020 Please note there was another massive front end strip down in 2019 when the new TCI custom IFS
and comprehensive cooling package was fitted. This page is, however, very important as it
shows how a clean fire wall was prepared.
It also shows how an extra 2-inches of driver leg room was achieved by "podding" the firewall.
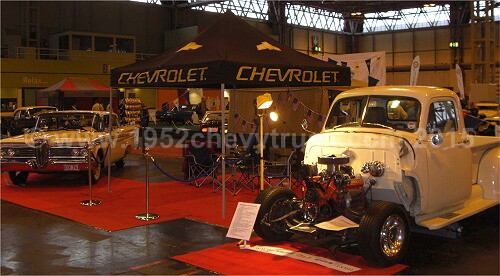
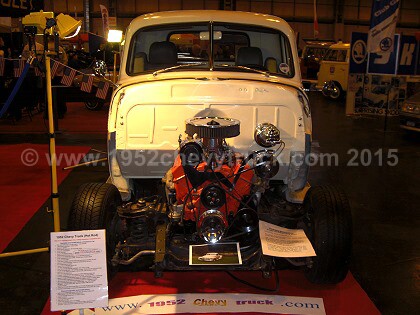
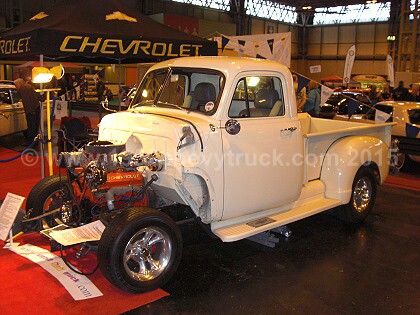
The British Classic Car Show. Nov 09. NEC.
Well ... we made it... firewall finished, podding finished, engine back in, temporarily put the old
suspension back on, set up the suspension and towed it using an A-Frame.
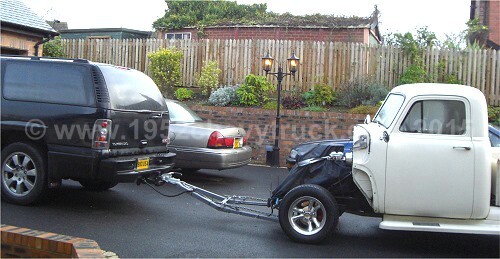
My GMC Yukon Denali XL was used to tow the truck the 205 miles to the National
Exhibition Centre (NEC) in Birmingham England.
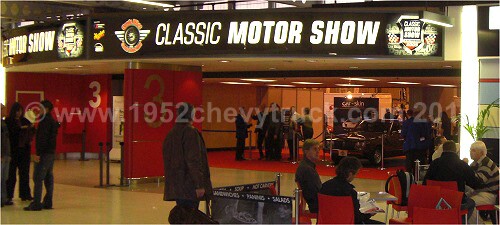
The photographs were taken on the Thursday set-up day as we knew that on Friday, Saturday and Sunday the truck
would be always surrounded by people. This was an understatement! Seeing the truck stripped like this was
very popular. The results of all of the work since September can be seen including the clean firewall.
Update 2020 You can see below a picture from 2020 and this shows how this important page laid the
groundwork for all improvements to come. The importance of a clean firewall led to all of the other improvements.