Correcting the geometry for correct line pressure, gear changes and smooth changes.
Very important -
Before explaining how to set this all up correctly I need to explain the dangers of not setting up correctly.
1. If the TV Dent cable is not adjusted correctly you can burn out an 200r4 transmission in a few miles!
2. If set up badly but not dangerously, the line pressures will be incorrect at each speed, the gears will
change at the wrong times and the changes will be sudden and not smooth.
Common mistakes are made for the following reasons -
1. You must not assumed Street Demon have put the holes for the dent cable in the correct place for your transmission.
They are not have done! Indeed different transmission companies need the holes to be in different places.
2. You must not assume, if the Lokar bracket is used, that Lokar may have included parts to adjust the geometry for
various makes of 200r4 transmissions. At the present time they do not.
It is therefore very important parts are adapted so that the geometry is corrected to make everything work perfectly.
This page (with many pictures) will explain why this is important and how to adapt the parts to have the correct geometry.
If you are using a different carburetor or a different bracket, these note will still help you.
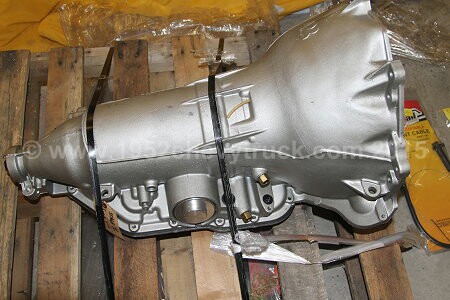
The transmission used in this example is built by "Extreme Automatics".
The problem -
If you have any carburetor and a 200r4 transmission, hooking the TV dent cable onto the carburator,
then just pulling the cable tight before fitting the end stop ... if you then expect it to work correctly,
well ... it probably will not. Indeed this method will probably result in the destruction of your transmission!
The reason is, with just a reasonably tight cable, the piston in the transmission which determines the line (oil) pressure
will be extended by about 1 inch. At 1 inch of extension the line pressure at idle will be zero. Therefore you will be
pulling away from stationary with no transmission oil pressure and this will cause damage.
It will be damaged because -
1. The process is much more complicated than this and the piston needs to be further in at idle.
2. The cable adjustors on the bracket have no effect on the geometry and so cannot solve the problem
3. Don't assume the cable hole in the carburator is on the correct place no matter what the manufacturer claims.
Check with your transmission supplier -
You need to check the tech sheet from your transmission supplier to find out the piston movement required for your transmission
to be used safely (without being damaged) and for the gears to change smoothly and at the correct time. The transmission in this
example was built by "Extreme Automatics" and the piston movement must be 0.84 inches + or - 0.02 inches. That is between
0.82 inches and 0.86 inches. This movement is from fully in at full throttle (TWO) and fully out at idle.
Setting up -
To set up the TV Dent cable (sometimes incorrectly called the kick down cable as it does more than this in a 200r4)
the oil needs draining from the transmission, the sump pan must be removed and the piston must be observed. This really
needs 3 people. One person lying under the car or truck to observe the piston (just jack up the vehicle up including stands
for safety so you have clearance to lie underneath). One person is adjusting the cable on the carburetor, (a small stool to
stand on helps as the front of the vehicle ends up being a bit high). One person inside the vehicle pressing the throttle
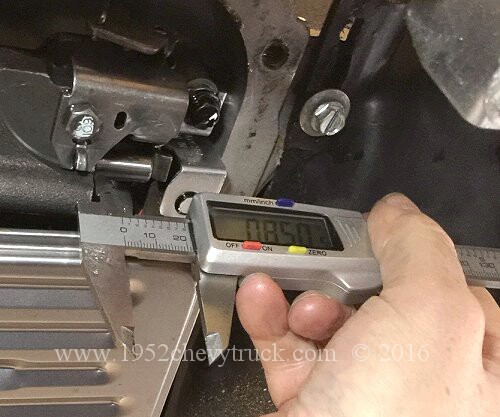
pedal when told to. The person underneath needs a vernier calliper to measure the distance the piston has come out.
Piston movement -
It is always important to understand the theory if a problem is to be solved. It really helps if you know what you are doing!
When the accelerator pedal is pressed fully that is called "Throttle Wide Open" or "TWO", the piston in the transmission
must be fully pulled in. That means the amount of piston sticking out is zero. This is done by depressing the pedal fully and
at the same time pulling the cable, usually with some pliers and then locking it in position on the carburator with the
cable end stop. It will then probably slacken very slightly. If the person on the pedal releases it then presses it again,
the observed amount of piston might be about 1mm and it needs to be zero. The process could be repeated again making
sure it does not relax at all but it is easier to adjust with the cable adjusters on the bracket. They will pull the cable and
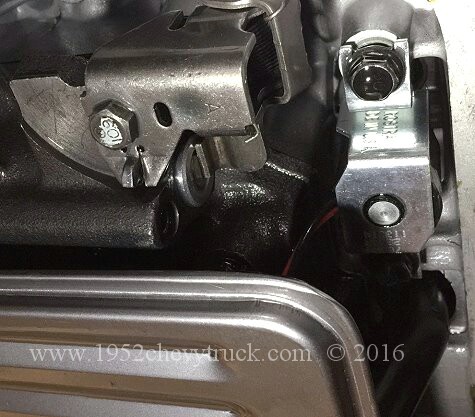
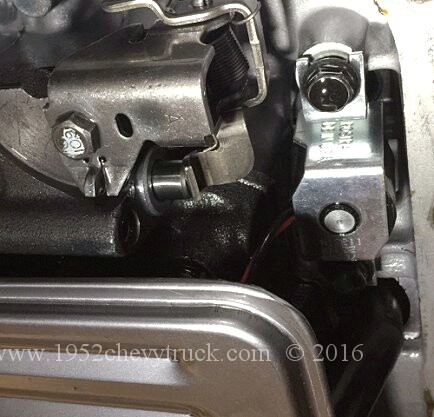
the piston will pull back in to the zero amount showing position. The left hand picture below shows the TWO piston fully in
with zero amount of piston showing. The right hand picture below shows the piston showing about 0.5 inches (not enough).
Once the TWO adjustment with the piston fully in is set and the end stop on the cable secure, let the pedal come up to the
idle position and measure the amount the piston is sticking out. (Everything from now on refers to the Extreme Automatics
200r4 transmission. For other transmissions, check what it needs to be). It needs to come out by 0.84 inches but it will be
fine if it is between 0.82 inches to 0.86 inches. It is unlikely it will come out the correct amount (as shown above right).
With the holes provided on the Street Demon carburetor it comes out about 0.5 inches to 0.6 inches depending on which hole
you use to hook on the cable. If you assumed this was correct and used the vehicle with this setting, you would not damage
the transmission as the piston is not further out than 0.86 inches. There will be plenty of line pressure at 0.6 inches,
however the gears will not change at the correct time and the shifts will be sudden. The pictures below show stage 1 on the
left in the TWO position, piston fully in. On the right, stage 2 measuring the idle position of 0.85 inches after the mod below.
The geometry problem -
Sorry if it gets a bit complicated here but the problem is that the hole provided to hook the cable onto on the Street
Demon carburetor is too close to the point of rotation. When the throttle moves from idle to TWO, the mechanism on the
side of the carburetor turns about a point of rotation (a shaft) and the distance from that turning point to
the cable hole is not enough.
Think of it like this - A door has a hinge and you want to open the door through a fixed angle of 45 degrees. The distance
the door moves in a curved path if you are 1/2 way from the hinge to the edge of the door is less than the distance the
edge of the door moves (through the same angle). Or, putting it another way, if you push the door right at the edge, your
hand moves further than if you push it at a point 1/2 it's width from the hinge (through the same angle).
Getting back to the piston movement ...
The only way to pull more cable through and to move the piston a larger distance for the same amount of angle turned
through is to have a hole further away from the point of rotation.
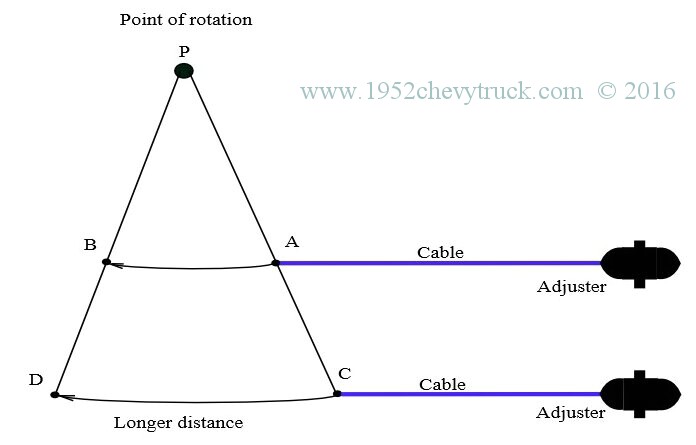
The sketch below shows the cable moves further (for the same angle turned through) if attached at point C rather than
point A. You can see that C to D is a longer distance than A to B. To achieve this longer distance, the cable must be
attached further away from the point of rotation. C is further from the point of rotation (P) than A is.
Solving the problem -
There is an additional adjustment to consider. The distance the carb turns and therefore the distance the plunger
in the transmission moves is also determined by the accelerator pedal travel. The accelerator must be adjusted to make
sure it travels from tick over to full throttle. Full throttle is when the throttle is turned as far as it can go.
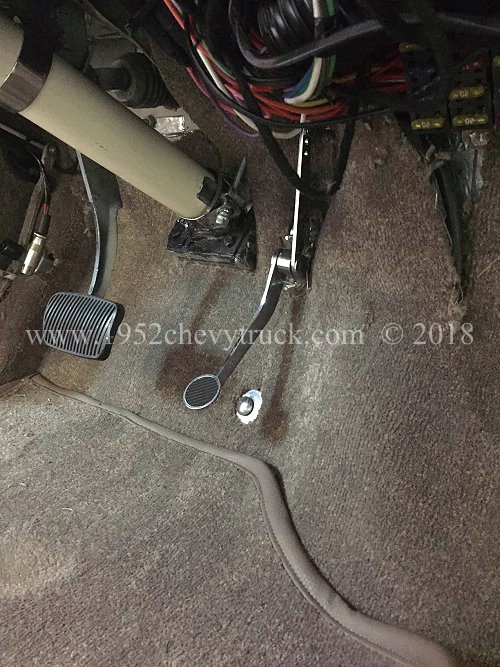
It is a good idea to make sure the accelerator hits a throttle stop at full throttle by fitting a special throttle stop
or even just a bolt with a large head through the floor so that the throttle cannot just be pressed into the carpet.
It is not a good idea to try to press the throttle too hard as it may stretch the cable or full the throttle linkage
too hard. This might happen if you are pushing into a carpet.
With the correct amount of accelerator pedal movement and the cable clipped onto the furthest hole in the carb bracket,
the correct amount of piston travel for this transmission (0.84") was correct.

Refilling with oil -
Once everything has been fully checked, the sump pan can be put back on the transmission and the transmission re-filled
with oil. Please note when filling with oil, it may look like it is full when the dip stick shows full, however, the oil level on the
dip stick then falls when the engine is running. Indeed without putting in more oil, the gears would not engage. Top up to
the full mark on the dipstick with the engine running. In addition, the level needs checking again after driving the vehicle
as again the level may fall a small amount as the transmission is used and heats up. The dip stick should read full after
the transmission has done some work.
Oil pressure meter / gauges -
It is recommended an oil pressure gauge is used to check the oil pressure are correct after the TV Dent cable is set up.
However, whilst this is a good idea if you have a gauge, as long as the process above is followed correctly the oil
pressure will be correct. By all means check the pressures is you wish.

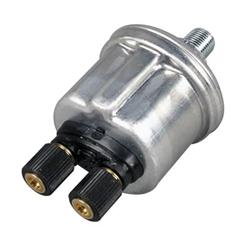
Electrical oil pressure in-cab gauges -
There are not many companies make an oil pressure gauge calibrated in psi. One available gauge is the VDO, 2 and 1/6th inch
diameter pressure gauge This is about �35 from companies like Summit Racing. An electrical pressure sensor is also needed and
this is about $50.00. The part numbers are 350110 and 360406 (0-400psi). With an in-cab gauge it is possible to check there
is line pressure at idle. Other pressures can also be checked from the pdf chart from "Extreme Automatics". It is important
to read this pdf 200r4 tech sheet and use it as an important resource before starting this work.
Update March 2017 You can see in the pictures below, there are extra gauges hanging below the dash.
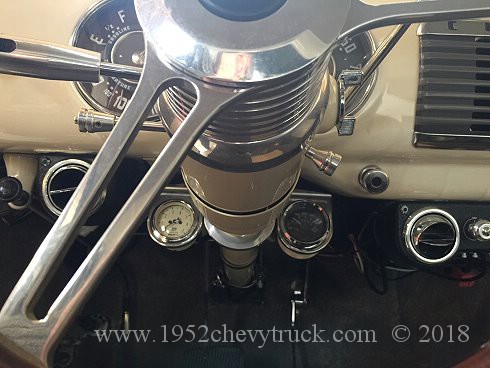
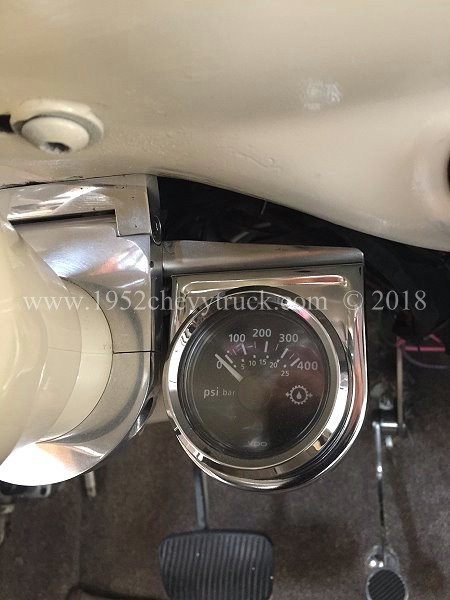
The chrome surrounds which come with the Bosch gauges are ideal for hanging extra gauges. Using a custom made
bracket across the top of the column there are 2 extra gauges, symmetrically placed each side of the column
under that dash. The one on the left is a rev counter and the one on the right monitors the oil pressure in
the automatic transmission. This needs a 0-400psi gauge made by "VDO" A VDO 0-400psi sender has to be
screwed into the side of the transmission and wired to the gauge Unfortunately VDO (the only company
who makes these meters) do not do a meter which looks as good as the meter on the left (would have
been better if they had matched) but anyway the 2 meters still look fine.
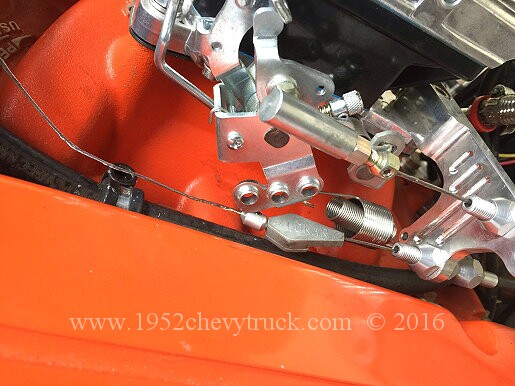
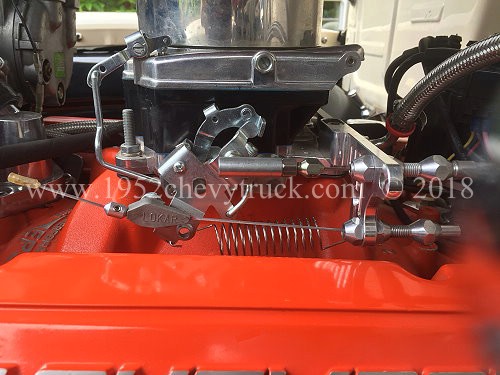
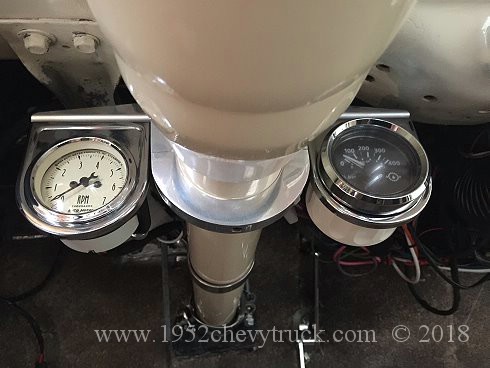
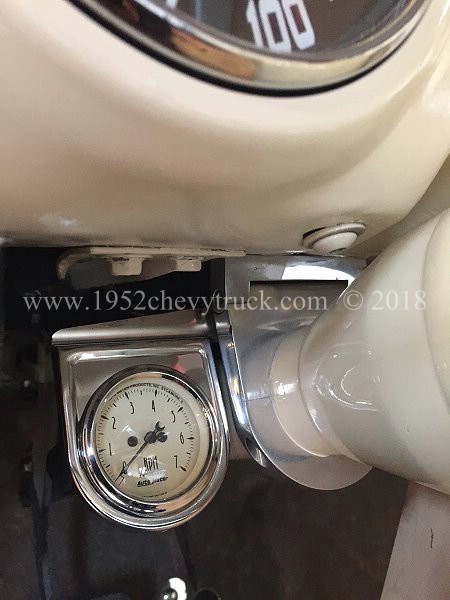
Update June 2020 - Fitting a throttle return spring. -
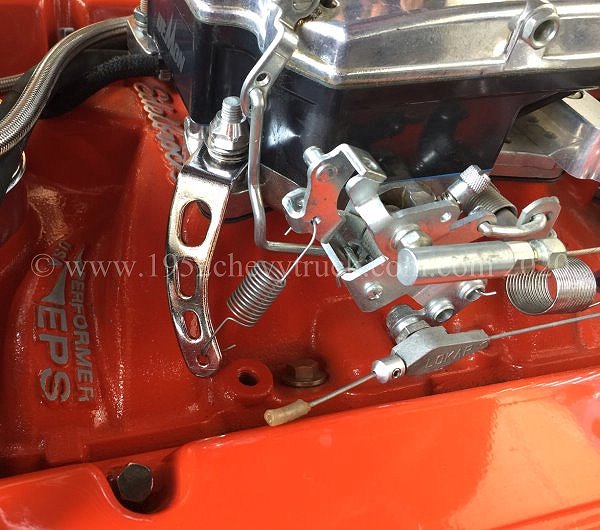
A throttle return spring is very useful as without it, the throttle may not return fully to tick over. It requires
a throttle return spring bracket and a throttle return spring. This bracket is available from many online
suppliers and is the "Spectre Performance 4708 Throttle Return Spring Bracket" It is typically about $7.00.
The return spring was found in a box of throttle springs of different sizes but what I can tell you is that the
distance from the throttle hook point and the bottom hole of the return spring bracket is about 2.5".
Since the return spring needs to be a little stretched when hooked into position, the spring length needs to
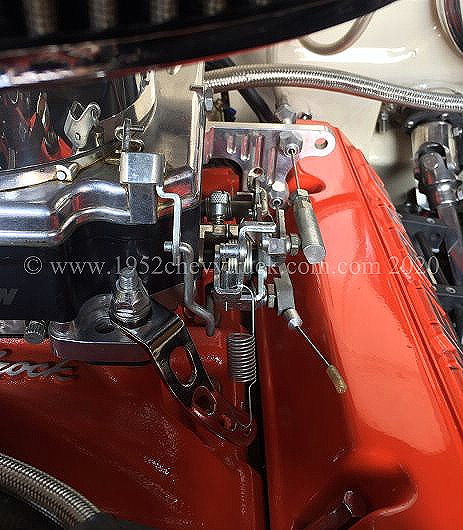
be about 2" to 2.25". Notice in the right hand picture above, the spring is correctly straight up and down.
I did find the Spectre bracket was not bent to an ideal angle, and so I put it in the vice
(protecting the chrome surface with masking tape) and I reduced the angle of the bend. This made it
stick outwards a bit more so that the spring was straight up and down when hooked in the bottom hole.
Carburetor notes. -
Notes on fitting and setting up the Street Demon carburetor can be found in several places on this site.
1. Fitting the carburetor - fitting.
2. Setting up the TV Dent cable.- TV cable.
3. Monitoring the transmission oil pressure - pressure gauge.
3. Fitting a throttle return spring - return spring.
4. Throttle cable and the need for a loop - Loop.