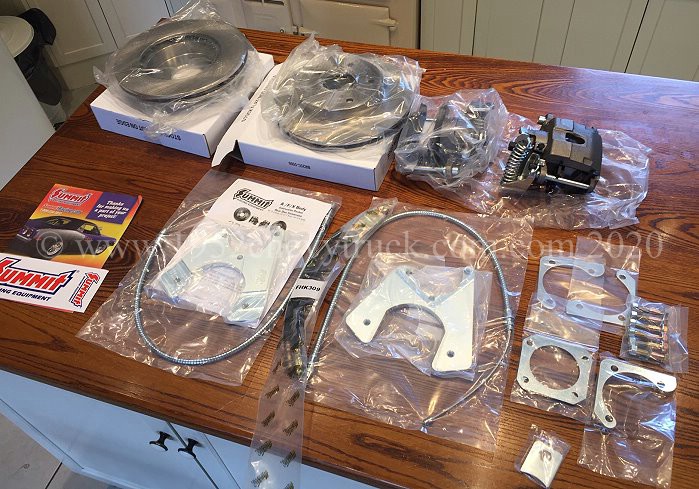
Including the 2020 rear disc brake upgrade kit and 2021 power booster upgrade.
Brake system parts list.
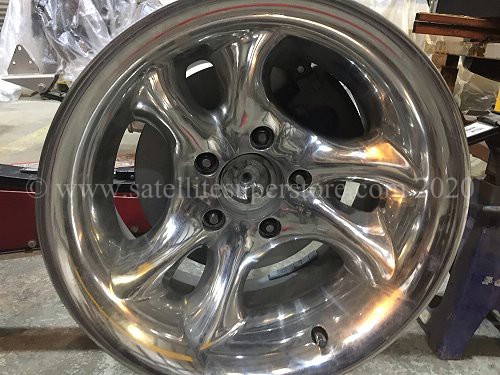
(Will fit 15" wheels and larger).
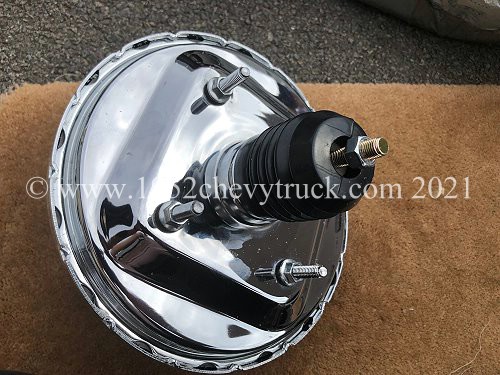
Brake cylinder with built in proportioning valve - from CPP - MCPV-1 master cylinder (CP31500-C 1" bore) ($199.00).
8” single universal booster / servo - from "Transmountracing eBay.com store ($69.88) but see update below.
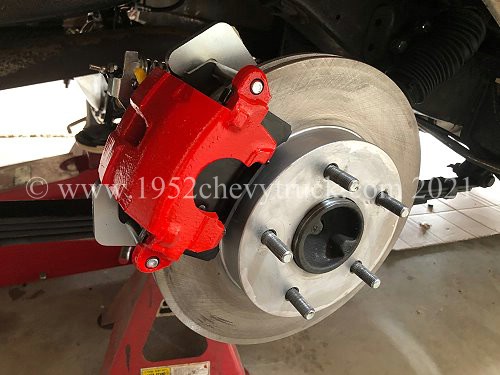
Front discs - TCI Custom 11" IFS standard discs painted silver.
Front calipers - "Wilwood D154 kit 140-12100-R" for 0.810" rotors (fitted to "TCI Custom IFS") from Summit Racing ($383.32).
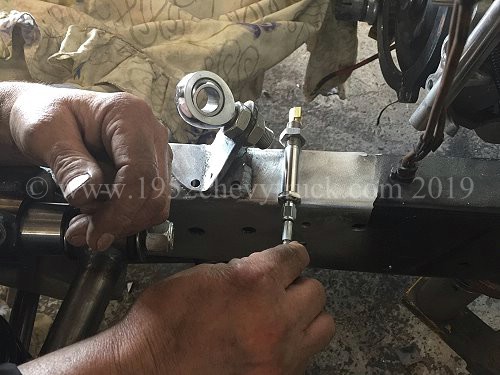
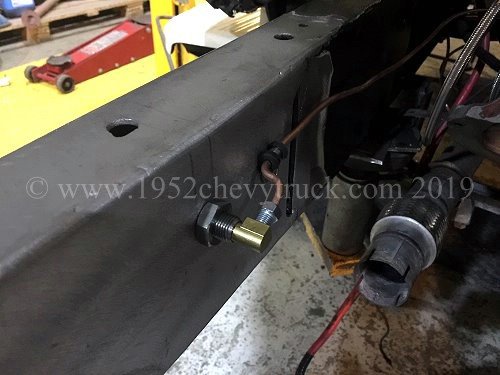
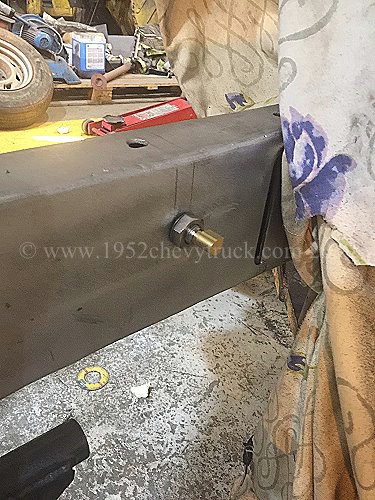
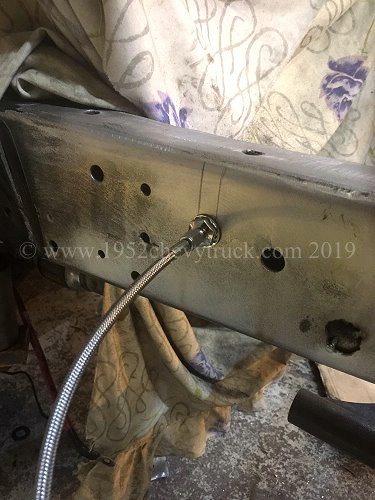
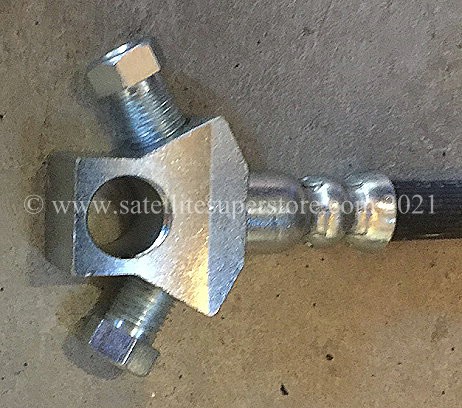
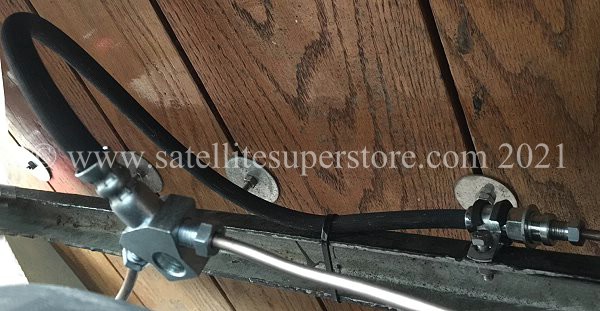
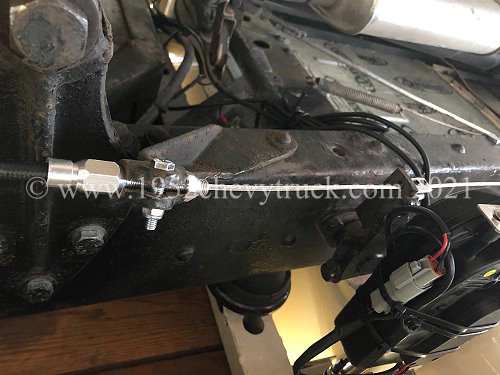
Through chassis brake unions - connectors and right angle connectors are 910-31361 and 910- 91833 from Speedway Motors.
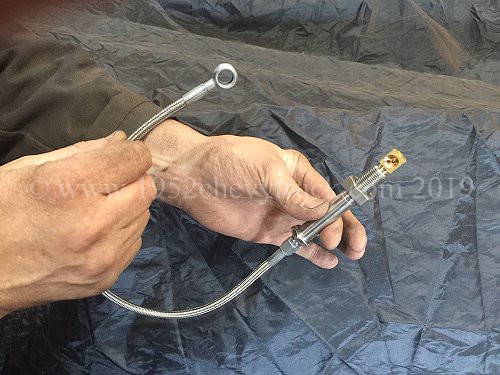
Front flexible brake pipes - JEGS 635005 18" pre-assembled brake hose with 3AN male to 1.5 male adapters" also from JEGS ($19.95 each)
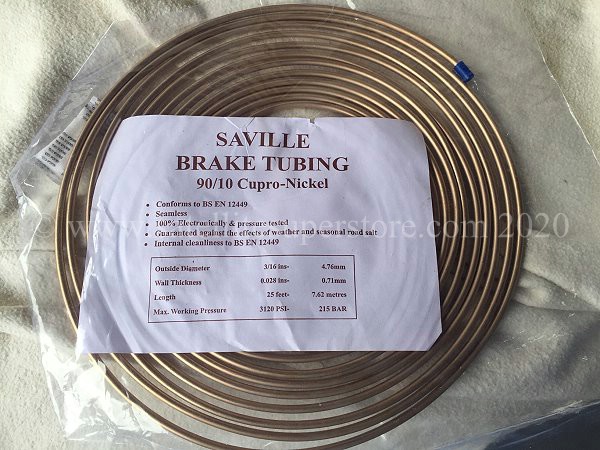
Brake pipe - "Saville Brake Tubing" 90/10 Copper Nickel from eBay (Ł14.95)
Brass 3/16" T piece union - from eBay. Brass 3/16" inline union - from eBay.
Rear flexible brake hose with integrated T piece 91755591 - from Speedway Motors with two 3/8" to 3/16" adapters from eBay ($24.95)
Rear 11" disc brake kit - Summit Racing SUM-BK1623 for 7.5" 10 bolt axle, c-clip eliminator, small GM flange, non-staggered ($349.00).
Longer lug bolts for rear discs - "Dorman 610-259" wheel studs from Summit Racing ($14.99).
"MOTIP 04098" Red Brake Caliper Paint for rear calipers from Amazon.
"E-Tech XHT002-ET" Silver Extremely High Temperature Spray for front and rear disc rotors from Amazon.
Comma Dot 5.1 brake fluid from Amazon.
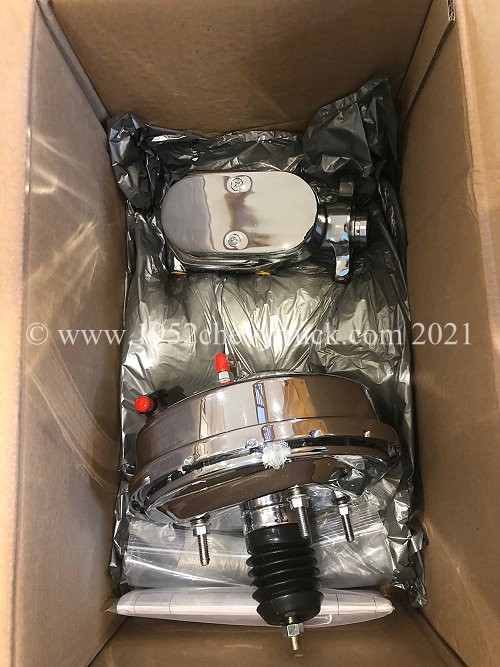
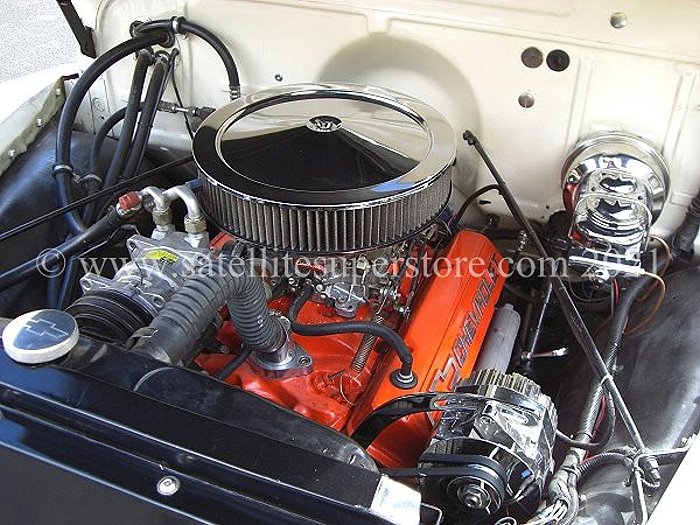
Update July - Aug. 2021 (full details are below).
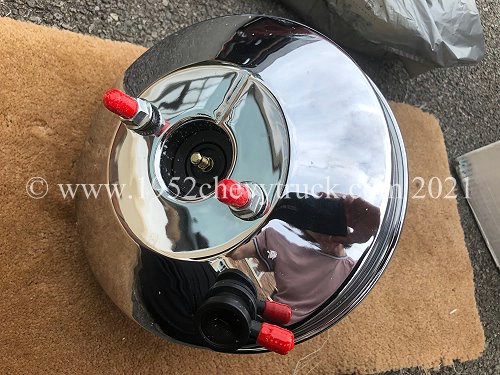
A new 9" single booster and master cylinder became available. ""Leed Brakes" provided the new matched combination.
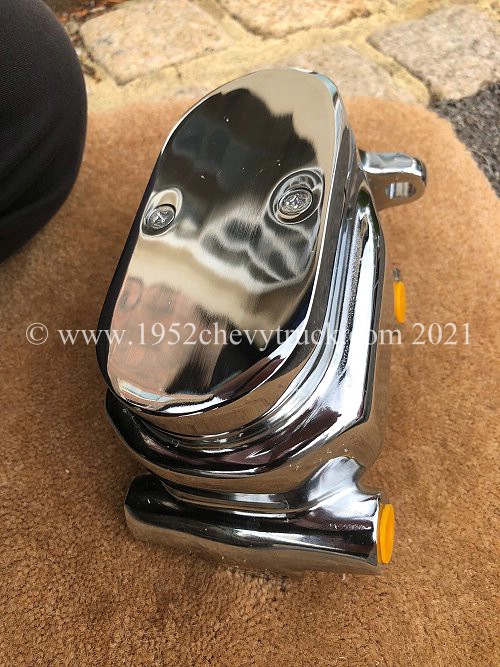
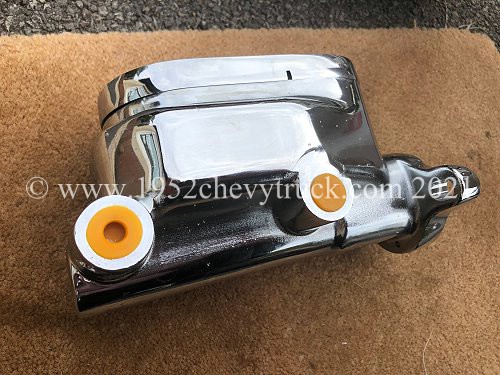
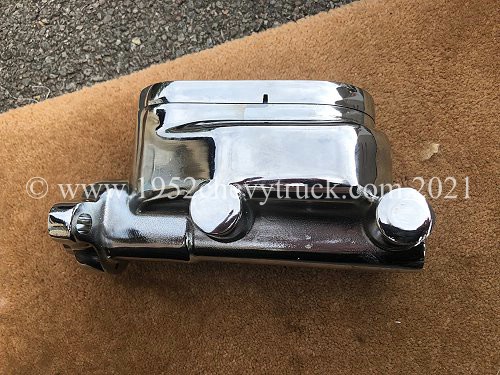
The CPP MCPV-1 master cylinder was replaced with a new 1964-66 universal chrome
aluminium master cylinder ""1" bore Flat top M_F" from Leed Brakes at $125.00 (without proportioning valve).
The 8" chrome single booster was replaced with a larger 9" chrome ""PB02" single booster from Leed Brakes
at $109.95. (Note their eBay sales are cheaper than their web site - use proportioning valve "PVC-B from Lead Brakes)
The diagram below shows the actual system used.
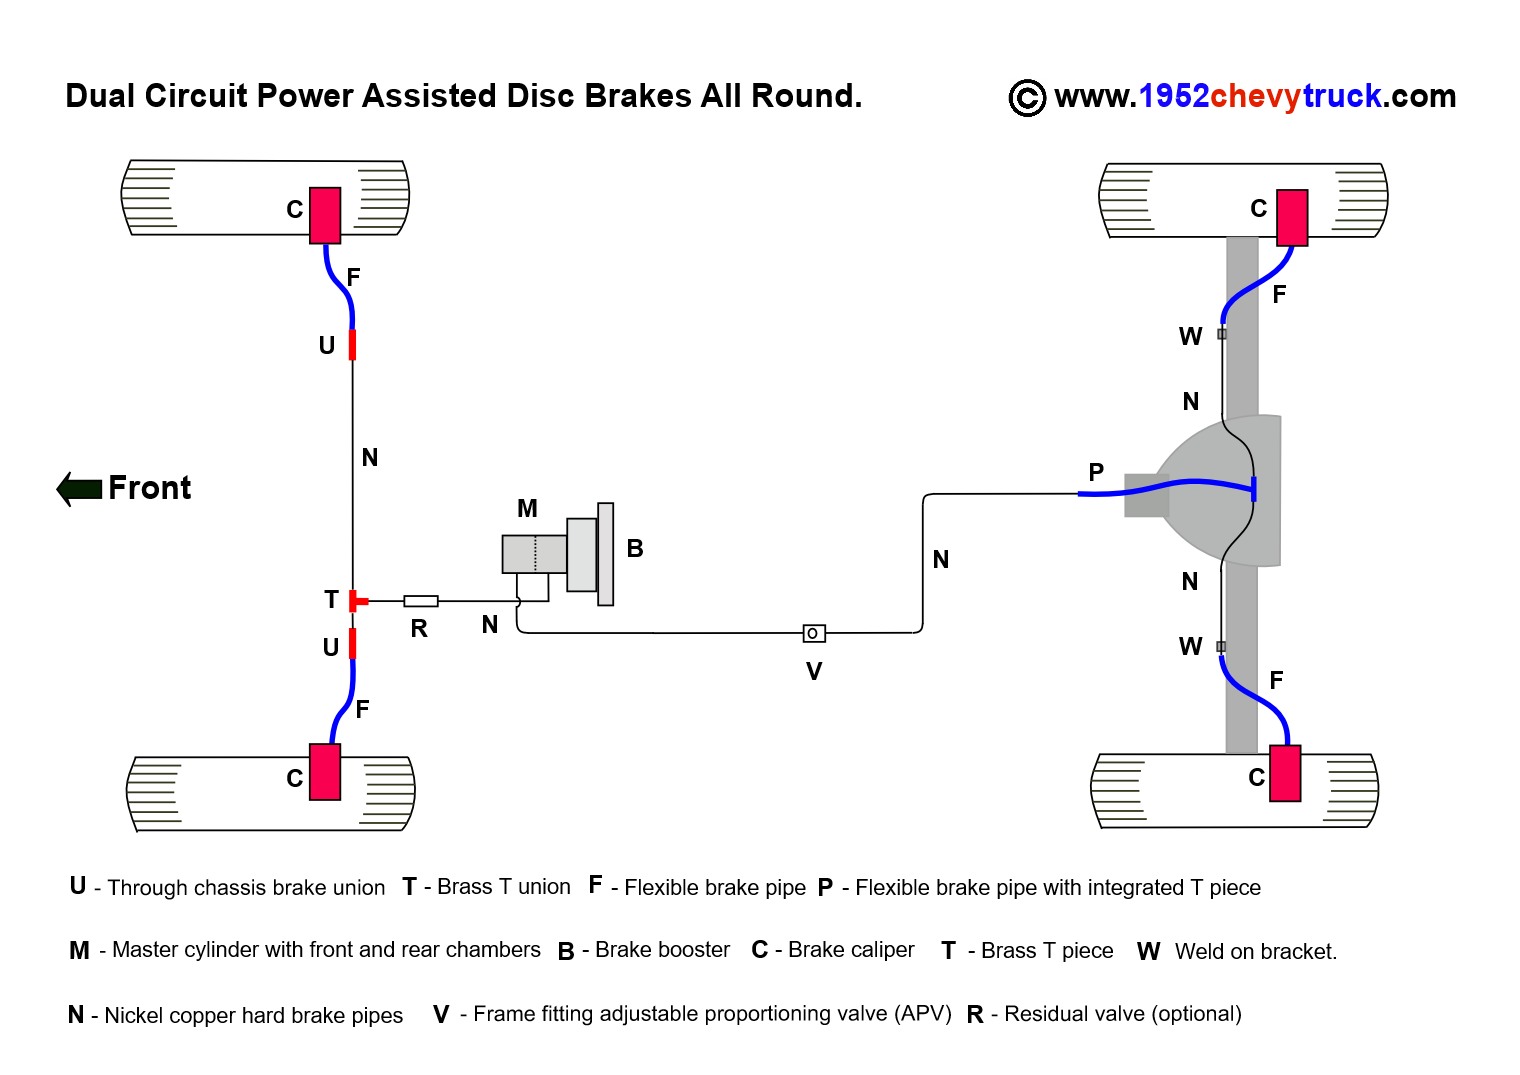
Brake lines.
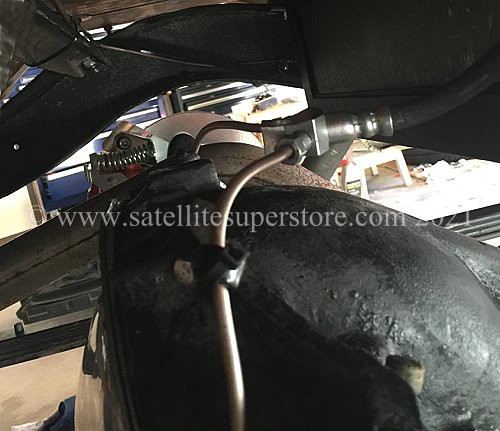
The master cylinder has 2 chambers, front and rear. The rear chamber is connected to a hard brake line which goes to a
brass T piece fixed to a stainless steel bracket bolted to the chassis. 2 pipes go from the T piece to the through
chassis brake unions, then to flexible pipes connected to the front calipers. The front chamber goes to a 2nd hard
brake line and on to the rear of the vehicle. This hard line is central and rear where it connects to a flexible
hose which has an integrated T piece at the other end. The T piece is above the diff and the T piece connects to
2 hard lines which each connect to flexible lines, the interface being fitted to weld-on brackets on the rear
axle. The flexible lines connect to the rear calipers. The hard brake lines are made from Nickel Copper pipe.
It is advisable to fit an adjustable proportioning valve in the rear lines.
This can reduce the rear brake pressure until the correct balance of front to rear pressures is achieved.
A residual valve is only needed with all round disc brakes if the master cylinder is lower than the calipers.
If the master cylinder is fitted high on the firewall a residual valve is not needed.
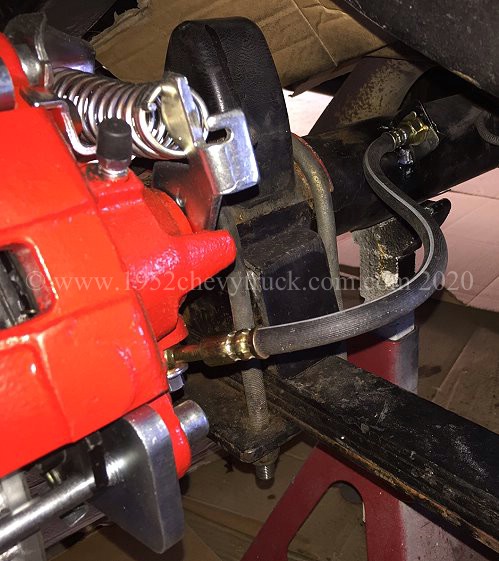
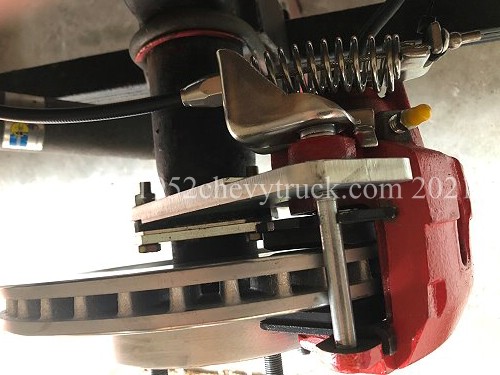
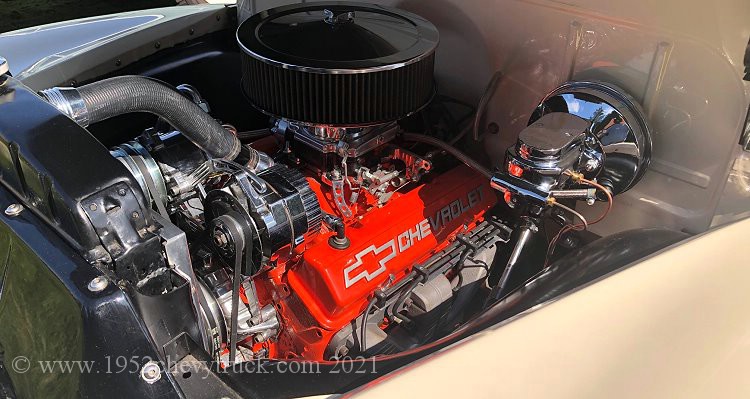
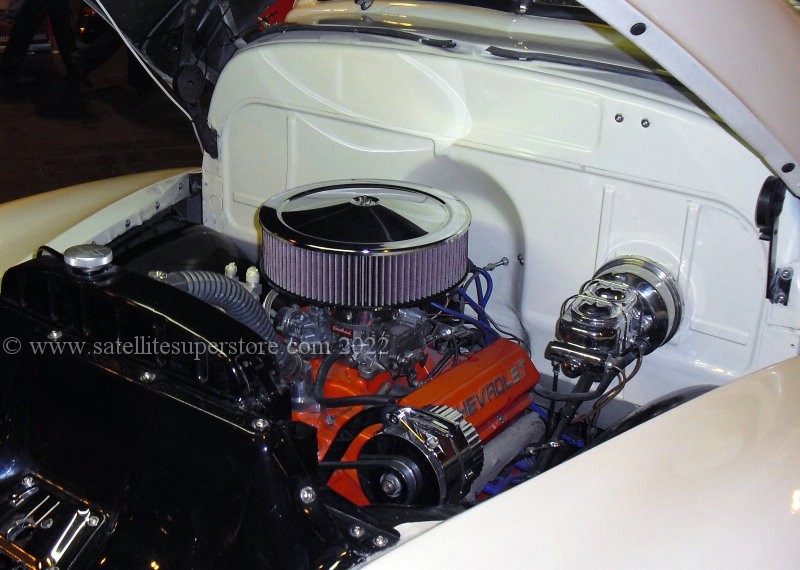
Jan. 2020 Wilwood Front Brakes.
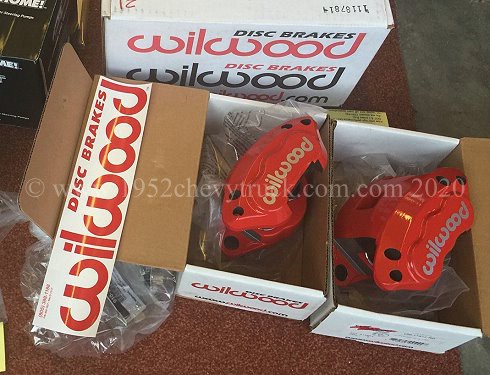
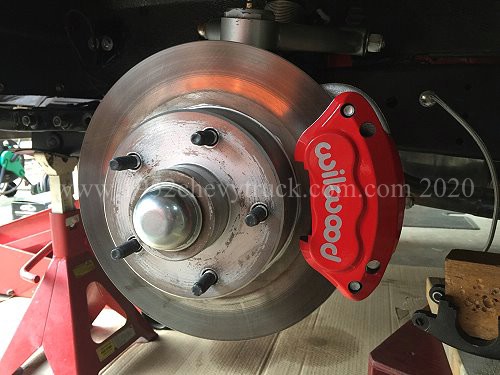
Front left and front right shown below.
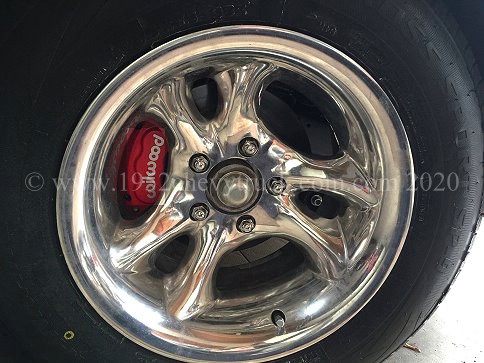
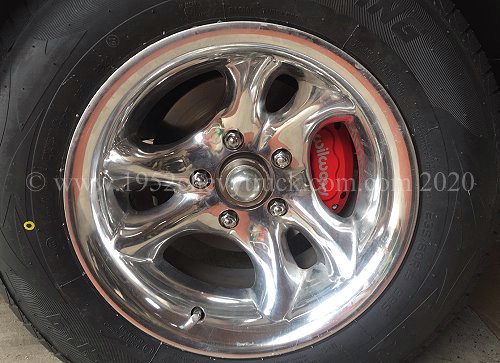
The full details about these front brake discs and calipers are detailed on another page.
That is because they are part of the "TCI front suspension (IFS) upgrade" in 2020.
Click here for more details on the Wilwood front disc brakes.
Front Brakes - Painting the Nickel Copper pipes with chrome paint.
Front Brakes - Through chassis brake unions and right angle adapters.

There is more information about fitting the front disc rotors and the calipers etc. on the
"fitting a TCI Custom IFS" page. (Note this is a long page so scroll down)
and the upgrade to Wilwood calipers at "brakes upgrade Jan. 2020".
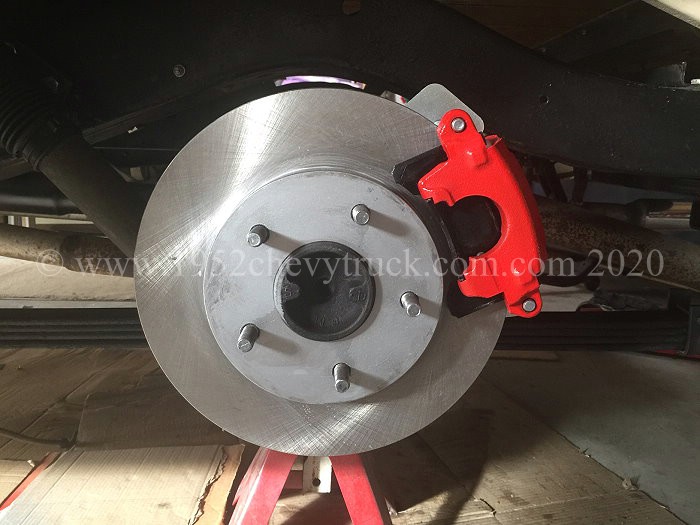
Oct. 2020.Summit Racing rear disc brake upgrade kit.
Test fitting my wheels for clearance on a friends identical kit.
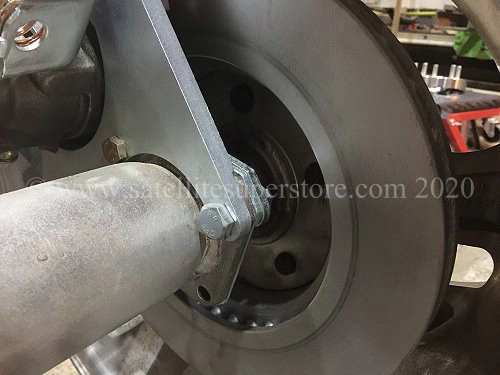
There is more information about identifying which is the correct rear disc brake upgrade kit for your axle.
It is particularly important to identify the end housing flange.
More information on the rear axle page notes.
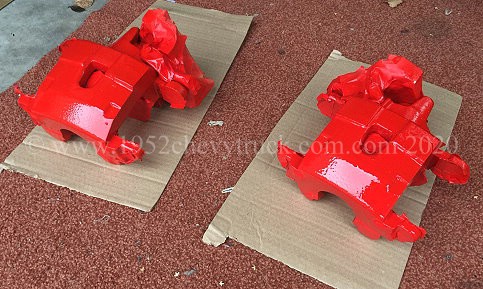
Cleaning, heating and painting the rear calipers.
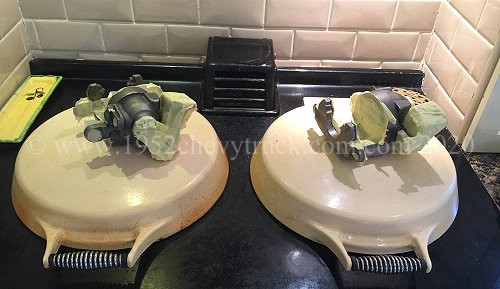
Cleaning, masking and painting the disc rotors silver
Notes on painting the calipers -
The calipers were painted red. You can see below, they were masked and heated on a stove and then sprayed red
using "MOTIP 04098 Brake Caliper Paint". Having already used this paint on my car brakes, I knew how good it
was. When reading reviews on this paint, mostly it gets 5 stars but sometimes 1 star. I believe these people
are not cleaning the calipers properly before application even though they claim they have. They should be
cleaned with "Panel Wipe" from a auto paint supplier store. Since the caliper manufacturer puts a coating of
protective oil on the caliper, I have found they need cleaning about 4 or 5 times with panel wipe. Also using
cotton buds to get into the corners. Only when the soaked cloth is completely clean after the 4th or 5th
attempt will the calipers be ready for paint. Also note - use panel wipe in a well ventilated area and avoid
breathing in the vapours and wear gloves. Several coats of paint are needed, allowing about 30 minutes
between coats. The process can be speeded up with a hair dryer. Then wait several hours before removing
the masking tape. Put a thin coating of high temperature lubricant on any non painted masked up areas where
it was removed. (The protective oil was removed from some of the casting where the masking tape was placed
so that the masking tape would stick to the surface.)
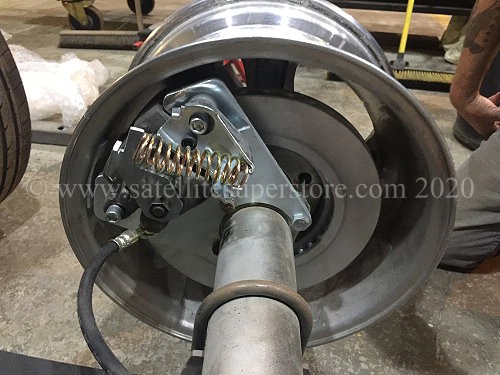
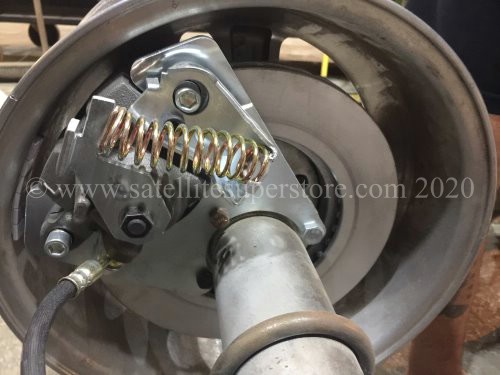
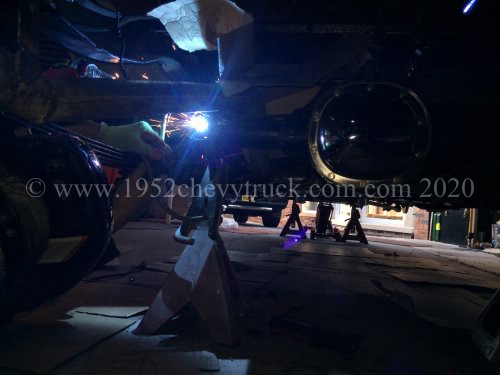
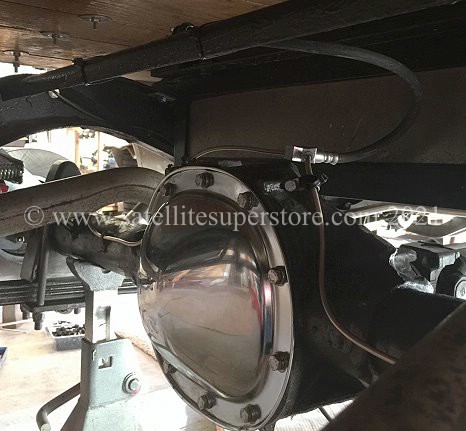
Welding the hose brackets (included in the Summit kit) onto the axle.

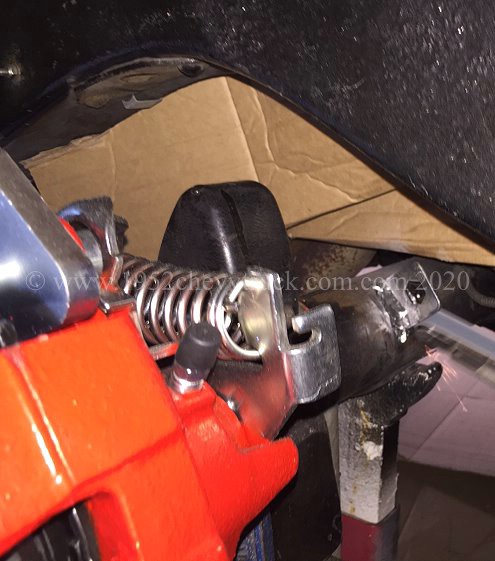
Why flexible hoses between the caliper and the axle?
Clearly flexible hoses are needed at the front as they have to flex as the steering is turned. You might
say that hard lines could be used at the rear as there is no movement due to it all being suspended.
There are a number of reasons. The first is that this is the recommended method for the Summit Racing kit.
The hoses are included and the brackets with curved edges to fit on the axle are included. The second
reason is that all modern cars use this system. Therefore what are the advantages? If you need to change
a wheel bearing, or a disc rotor, or are even having difficulty changing pads with the caliper bolted on,
you can hang the caliper on a cable tie and since the flexi pipe is still connected there is no need to
disconnect the brake pipes, or lose the fluid, or have to refill and then have to bleed the brakes.
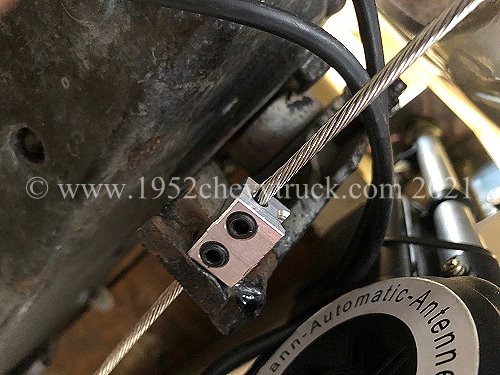
The most important flexible brake hose is the one with integrated T piece and is shown in the
diagram below since here, above the "diff", it has to flex as the suspension goes up and down.
Nickel copper brake pipe.
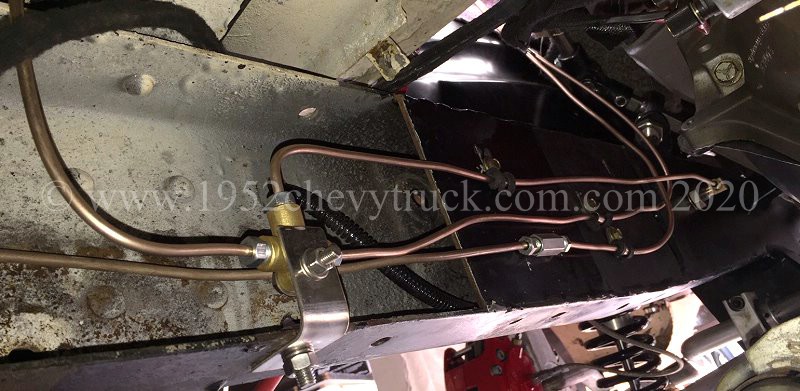
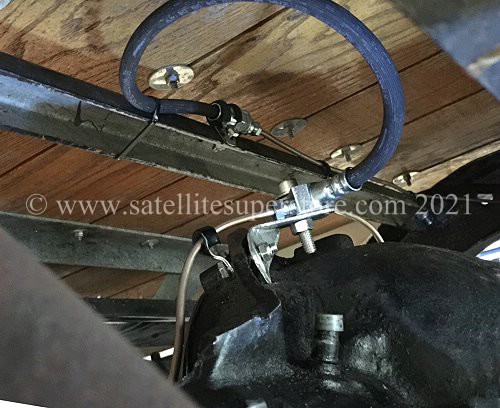
Nov. 2020 Rear Brakes and T Junction above Diff.
In the picture above, the brake pipe going under the T piece and disappearing off the left of the picture is the pipe from the
front chamber of the brake cylinder and is going to the rear brakes. This pipe needs to be split to the two rear brakes and
this is done with a flexible brake pipe. This pipe is shown below and comes from Speedway Motors. Part Number 91755591.
("S" in the diagram above) It is fitted centrally and the integrated T Piece end will be above the rear axle / diff.
This pipe flexes as the rear suspension goes up and down.

25th Oct. 2020
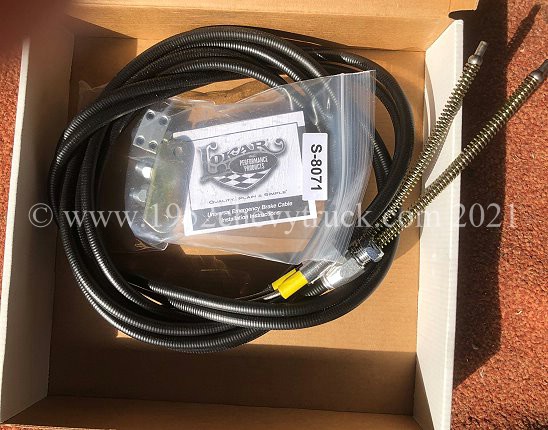
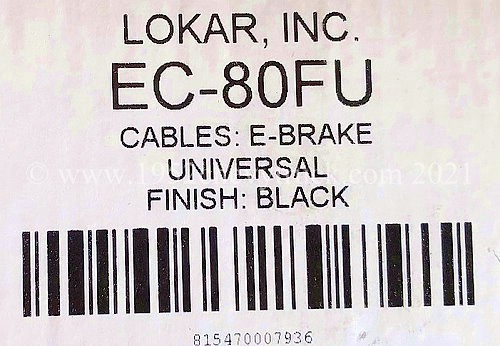
Parking Brake Cable
The work on the rear brakes continued for another 2 weeks as we are waiting for a part to arrive.
In particular the parking brake cable from Summit Racing. A high quality Lokar EC-80FU
cable was purchased for $177 and fitted. See below
Summary. We seemed to spend the whole of 2020 working on the brakes and many
improvements were made. however, they still did not perform as well as I had
hoped. There was therefore one last upgrade in 2021 and that is shown below.
Update July-August 2021.
Another new master cylinder and booster.
This upgrade was the result of a new 9" single chrome booster PB02 becoming available from "Leed Brakes" in the USA.
They also did a very nice master cylinder (M_F05) which was recommended to be used with it. This is important as
it means the bolted-together combination had been adjusted and tested to eliminate compatibility problems.
If a proportioning valve is needed, "PVC-B from Leed Brakes" can be fitted in a discrete location on the frame.
Since this master cylinder does not have a proportioning valve built into it, it is smaller and looks better.
Checking the Leed Brake web site, this kit would be over $500, however, they also sell these items on ebay and
the eBay listings are significantly cheaper.
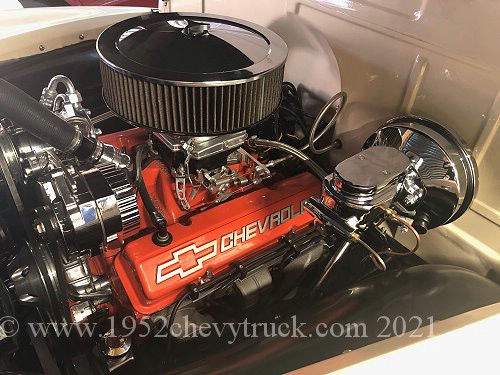
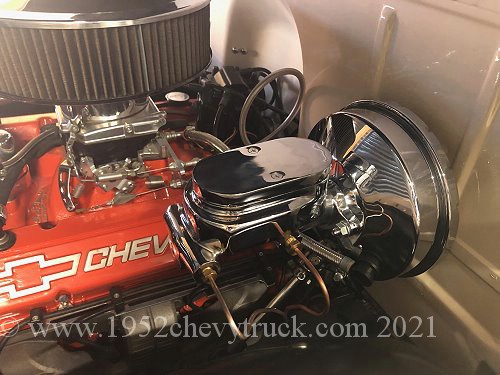
With disc brakes all round, and with the new 9" booster, the brakes were much better. Stopping distances were shorter.
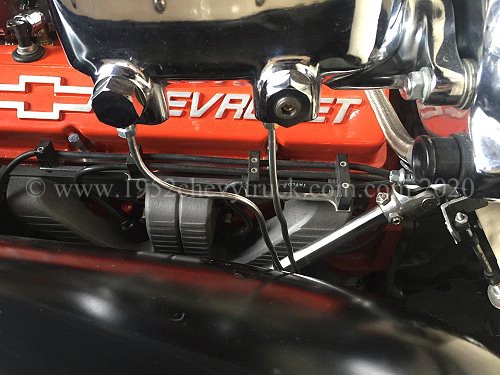
showing the chrome cylinder and booster
The pictures below show progress from 2007 to 2021 and in particular the chrome brake master cylinder and booster.
25th June 2007
When the truck was purchased in 2007, it had single circuit brakes with the original master cylinder under the floor.
They were not power assisted. The picture below shows there was no brake cylinder with booster on the firewall.
There were disc rotors on the front and drum brakes on the rear. Brakes were not power assisted. Original pedal
through the floor. Pictures taken straight after purchase in the USA and before the truck was shipped to the UK.
10th August 2008.
Chrome aluminium master cylinder and 7" chrome booster fitted to firewall. Now with dual circuit brakes.
There were still disc rotors on the front and drums on the rear. New modern pedal box and pedal fitted.
Nov 2010.
After the big upgrade to produce a "clean" firewall in Sept - October 2009, the 7" booster and master cylinder
were refitted and the front end all reassembled by the Spring of 2010. This picture was taken in Nov. 2010.
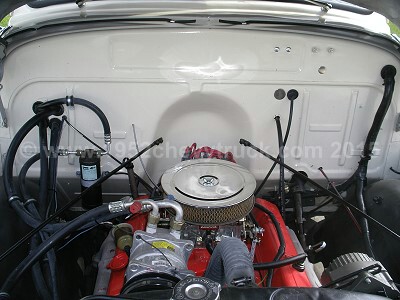
2019-2020.
In September 2019, the 7" booster and master cylinder, fitted in 2009, were replaced with a new 8" booster and new master cylinder.
Picture taken on 4th July 2020. At the start of 2020 there were were disc rotors on the front and drums on the rear.
In January 2020, the front calipers were upgraded to Wilwood calipers.
In October 2020 the rear brakes were upgraded from drums to disc brakes and a Lokar parking brake cable fitted.
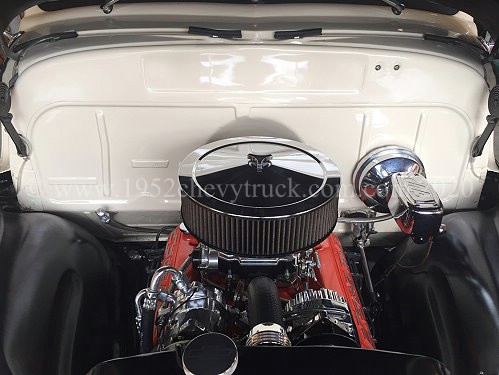
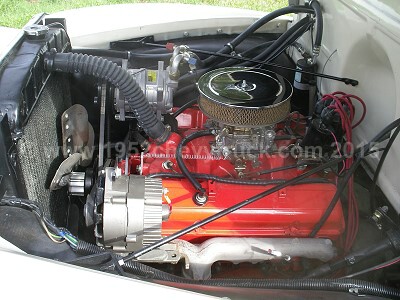
15th Dec 2021.
In Dec. 2021, the 8" booster and master cylinder were replaced with a new 9" booster and new master cylinder.
Update January 2022. The brakes on this truck are now very good. When the weather improves, the new
front brake pipes will once again be sprayed with chrome paint in the engine bay.

Scroll up to the top of this page for full details of all brake upgrades and lots of information.