The work on this 1952 truck continued throughout 2008. Aims - to modernise the truck and improve the
drive-ability but keep it, as far as possible, original on the outside. Picture below Aug. 2008.
Steering column and in the cab.
The adjustable steering column had a large spacer fitted between the dash and the column. It was about 50mm (2 inches)
thick and was unsightly. It spaced the steering wheel quite low and pushed the steering wheel towards the driver. This
spacer was removed and replaced with a spacer of only a few millimetres (about 1/8th inch). This moved the (new)
steering wheel into a much better position but the “knock on effects” were considerable. It affected the steering relay
shaft alignment and the steering was very “notchy” while turning the wheel. The relay shaft support bracket needed to
be re-made and re-aligned. Another effect was misalignment of the gear selector shaft. This also had to be modified
by rotating and lengthening the shift flange on the column (under the hood) and the column to transmission rod also
adjusted so that the gear selector worked perfectly. Finally the reversing lights were coming on in the “park” position
and this was also corrected. The new wheel was fitted. All of this work was completed by the end of April 08
Update 2015 - In 2015 a new IDIDIT steering column was fitted.
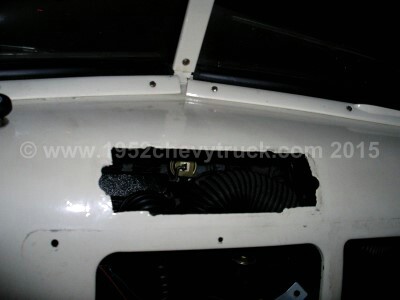
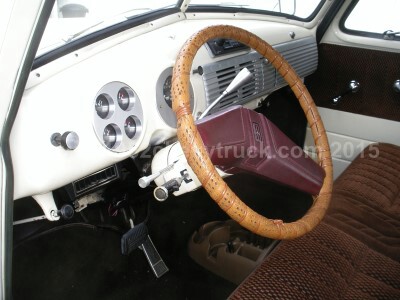
The hole in the dash were a modern radio had been fitted has now been filled was filled in. The original truck would
have had knock-outs in this position. (Two holes and a small slot for the original valve radio.) These knock-outs
had been opened and further cutting resulting on a large rectangular hole in the dash for a modern radio. Sheet
steel was cut exactly to size and formed in a curve to fit the hole and exactly follow the curves of the dash.
It was soldered in (with a 200W iron) and the final surface finished of with a very fine paste. After sanding it
looks like the dash had never had a hole in it. This work was essential in making the dash look clean and original.
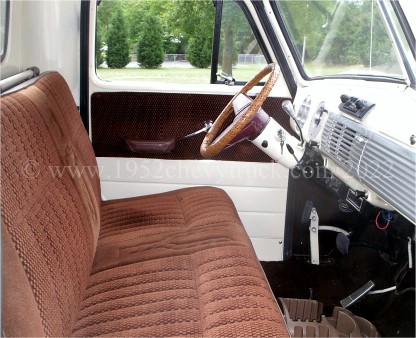
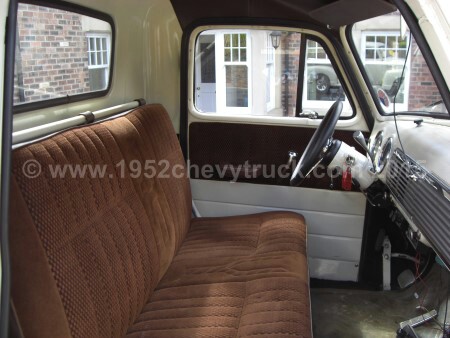
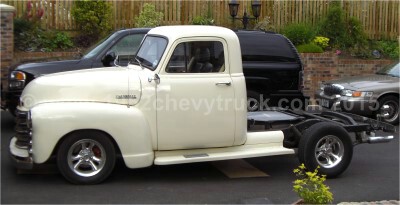
The left hand picture was taken in June 07 in the USA at the time of purchase. The right hand picture late 2008.
These pictures also illustrate the effect of removing the spacer between the column and the dash to raise the
column and the specially selected wheel with a small "dish" was fitted. The result of all of this was to provide
a larger distance between the seat and the wheel. This series of trucks did suffer from the wheel being too close
to the driver even with the seat pushed fully back. This new set up is better. Also notice the "clean dash".
Update 2015 - In 2015 a new IDIDIT steering column was fitted.
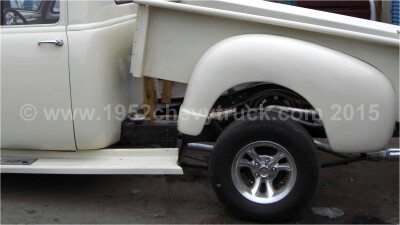
On 1st May low profile tyres were fitted to the front of the truck. The 15-inch “75” profile tyres were replaced with
15 / 60 / 225 tyres. This lowered the front of the truck by 1 & Ľ inches (but this does not affect the angle of the rack
ends.) The test drive showed another improvement in the handling of the truck especially while cornering although it
did make the ride a little stiffer and bumps more noticeable. The whole of the wheel and tyre can now be seen in the
fender arch which does look better.
Update 2019 - In 2019, new 235/60R15 98S TL Nankang Rollnex Cross Sport SP9 tyres were fitted.
Front anti-roll bar.
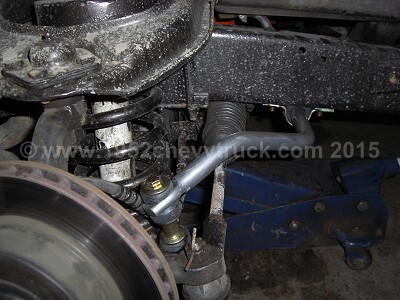
Fine tuning the handling of the truck continued with the fitting of a front anti roll bar.
Update 2020 In 2019 the ifs was replaced with a TCI custom ifs. This ifs has an integrated anti-roll bar.
See the 2019 ifs update page.
The next upgrade was for new shock absorbers all round. Back in 1996 I transformed the handling of my
1992 Buick Roadmaster by fitting stiffer springs on the back and putting the police specification
Bilstein shock absorbers all round.
Front shock absorbers.
I decided to talk to Bilstein and seek advice. They told me about a special Mustang II type shock absorber
they build for a company called “Race Car Dynamics” and all technical questions were referred to them.
It became clear that many of these expensive and very good Mustang II kits that you see in catalogues with their
many chrome parts often used poor quality shock absorbers. Maybe the shockers were chrome and looked good but were
not high performance. That is why "Race Car Dynamics" approached Bilstein to build some good ones, to their
specification, for the Mustang II type kit. (Remember Mustang II type kits are used in many different hot rods and
street rods – not just Chevy trucks). The Shock absorbers arrived and the front ones were fitted.
Update 2019. In 2019 the Speedway Motors Mustang II ifs was changed to the TCI custom ifs with coil overs.
See the 2019 ifs update page.
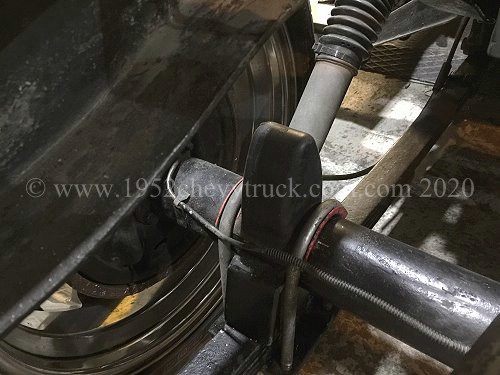
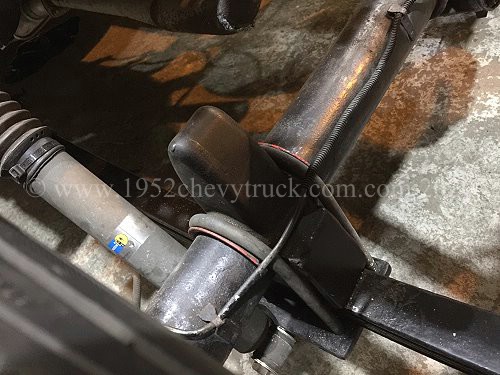
Rear shock absorbers.
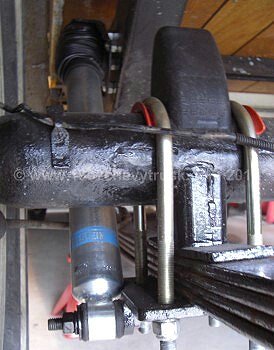
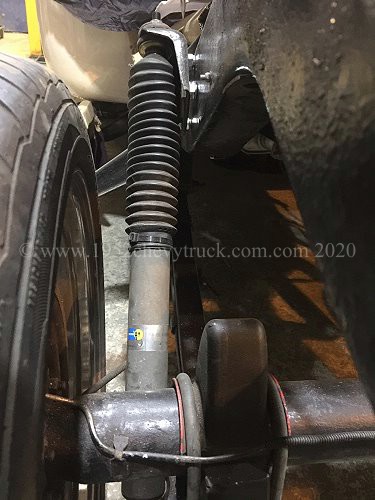
After the new leaf spring upgrade, the maximum rear shocker extension, minimum extension and ride height centre
to centre were measured and "Race Car Dynamics" selected some good Bilstein shockers for the back to compliment
the special Bilstein Mustang II units for the front. They were ordered in the first week in April 08.
They were then road tested. Once again there was a step forward in the way the truck
handled, especially while cornering.
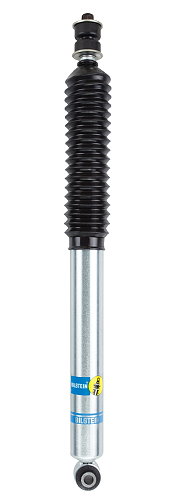
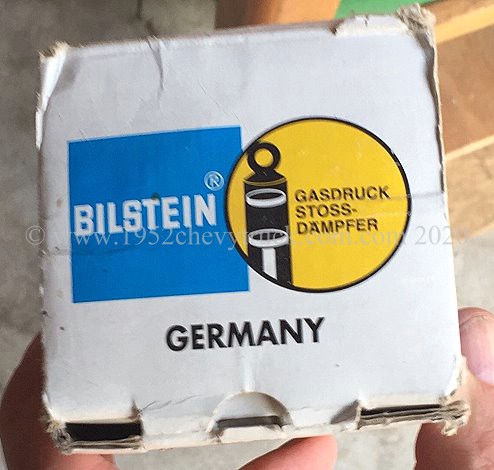
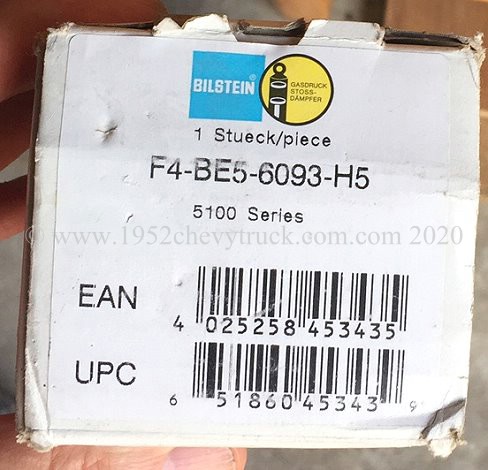
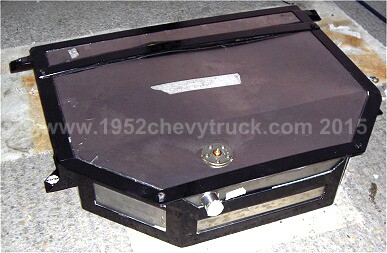
Update 2020 I kept one of the boxes in the garage and have added the 4 pictures below in 2020. You can see the rear
shockers are Bilstein F4-BE5-6093-H5, 5100 series. They are still on the truck and have worked perfectly for 12 years.
It looks like this shock absorber has been replaced by an equivalent model - Bilstein B8 5100 Series Shocks 24-185417
Available from Summit Racing and other suppliers for $95 each. It seems to be an exact drop in replacement.


Specifications -
SeriesB8 5100
Warranty:Bilstein Warranty
UPC: 651860453439
MPN: 24-185417 (updated part number)
Body Design: Smooth Body (Non-Coilover)
Body Diameter (ID): 46mm
Boot Included: Black Bellows
Collapsed Length (IN): 16.38
Collapsed Length (MM): 416.0
Extended Length (IN): 27.32
Extended Length (MM): 694.0
Finish: Zinc Plated
Internal Design: Monotube
Lower Mount Type: Eye 12mm
Reservoir: No
Series: B8 5100
Title: Bilstein Shock Absorbers
Upper Mount Type: Stem
By measuring from the two attachment points on your truck at the ride height you want, you can check whether
this measurement falls between the extended length and collapsed length of the shock absorber.
(See spec. above.) If this measurement falls reasonably in the centre of the two length and not
at the ends if the travel, the shocker will be ideal.
Update 2020. This is just a plan for 2021 at the moment. The plan is to lower the truck by about 1" at the back
by removing another leaf from the leaf springs. The effect on the Billstein shock absorbers has been calculated
and is represented in the drawing below.
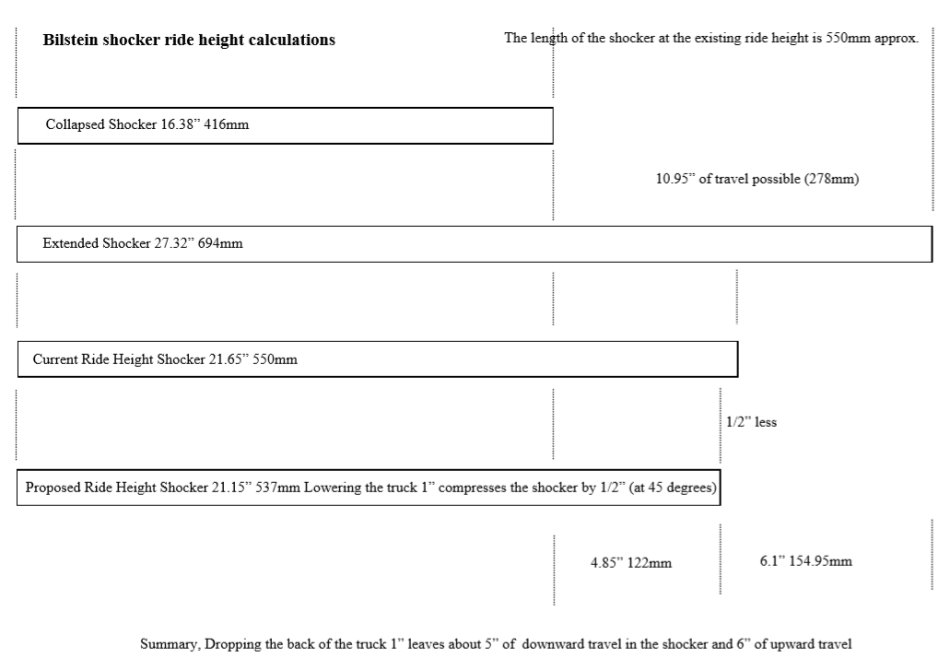
You can see from the drawing above, a ride height drop of 1" is well within the range of the Bilstein rear shock absorbers.
Bump stops and lowering blocks.
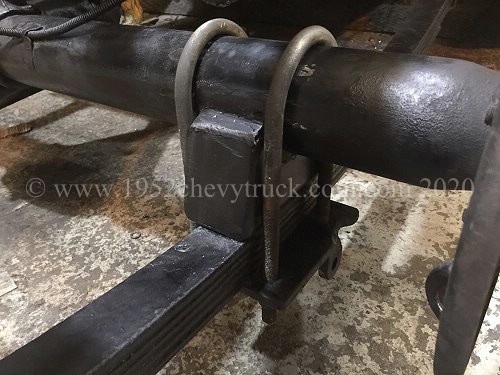
Bump stops from a year 2000 Ford Ranger were found (in a wrecking yard) to be perfect for the U clamps.
The original truck would have had bump stops fitted to the chassis (hanging down)
but these fit on the back axle (pointing up) and provide ideal safety.
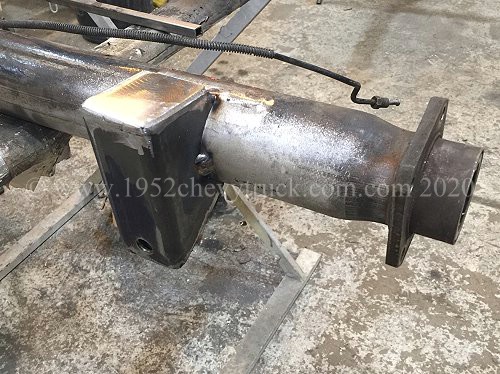
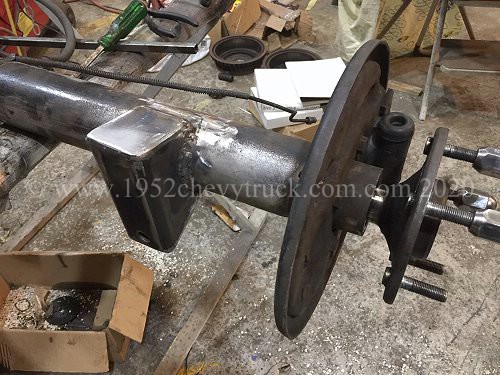
Update 2019 "Lowering Blocks" - In 2019, the rear axle was removed, checked, differential drained and refilled
and new lowering blocks welded onto the axle for the leaf springs. Larger lowering blocks will lower the truck.
Pictures below, top left tack welded, top right welded, bottom left springs clamped on, bottom left bump stops added.
Note - they must not be too large. It is usually not a good idea to make them larger than 2-inches high.
The larger the lowering blocks the less the stability. This method of lowering works well within reasonable limits.
No suspension component must hang down lower than the "scrub line". The scrub line is a line across the vehicle at
the height of the bottom of the rims. Check that the blocks and U clamps do not hang down below the scrub line.
Also note, the larger the lowering block, the more likely you are to experience "spring wrap".
There is a very good web site which explains, with excellent pictures/diagrams what "the scrub line" is and what
"spring wrap" is. It also explains the advantages and disadvantages of leaf springs and the various best ways
to lower the vehicle, pointing out both good and bad methods. This web site is called "How To Build Hotrods".
The original truck would have had single circuit drum brakes. When the truck was purchased, it already had
front suspension / brakes upgrade to dual circuit disc brakes, however, it was the intention to improve
safety further with larger discs and a power assisted servo unit and power steering rack.
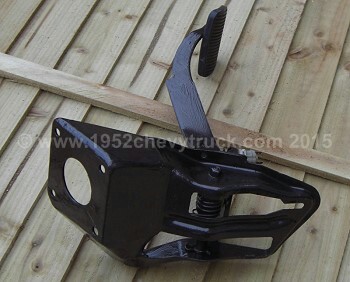
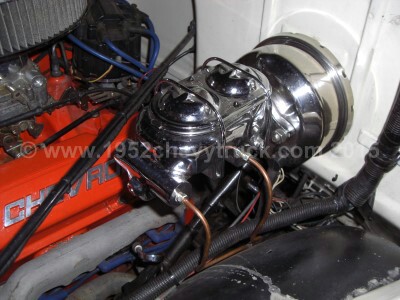
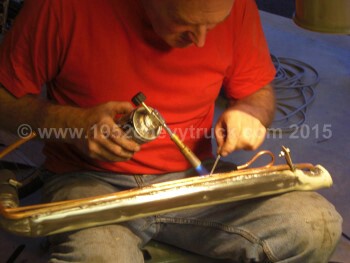
The aim was to fit modern power assisted brakes. The original pedal pushed through the floor and the brake
cylinder was mounted under the floor. A stainless steel break booster (servo) and chrome master cylinder
were ordered from Speedway Motors. This was fitted on the firewall (under the hood). A very time consuming
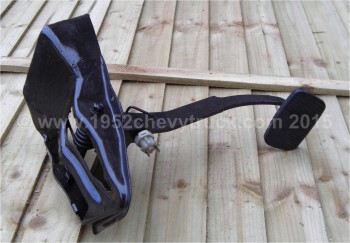
job was to manufacture a modern pedal box. This was done by taking a pedal box from a Vauxhall Senator
and with a great deal of measurement, assessment, adjustment and manufacture, it was modified to fit the
1952 truck’s firewall (inside the cab). It was then found that while depressing the pedal, the whole assembly
and servo flexed and lifted due to the firewall sheet metal lacking rigidity. In the cab a steel stay was fitted
between the pedal box and steering column. This eliminated all of the flexing. The modern pedal hung from
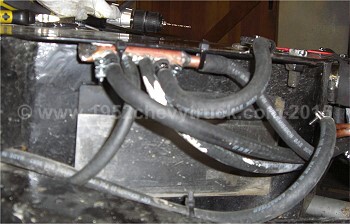
above at exactly the correct height. All of the brake pipes were replaced with new copper pipes. This was
now a dual braking system. 11- inch disc rotors (from Speedway Motors) were fitted and, in testing, the
brakes were light, powerful and precise. Once again drive-ability had been improved.
Update 2020 This work in 2008 was essential as a proper brake pedal and modern brakes formed the basis for
further improvements later. In 2020 the brakes were upgraded. Willwood calipers, and a new booster and master
cylinder were also replaced with improved units. See the 2020 brakes update.
2019 - 2021 Brakes Update. A large update was done to the braking system from mid 2019 to mid 2021 including
new brake lines, new fromt calipers, rear disc brake upgrade and new chrome booster and master cylinder
This upgrade is all detailed by clicking here.
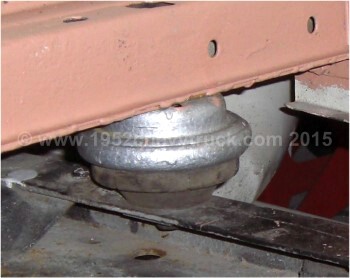
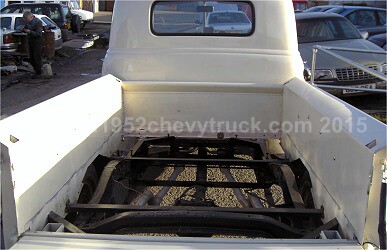
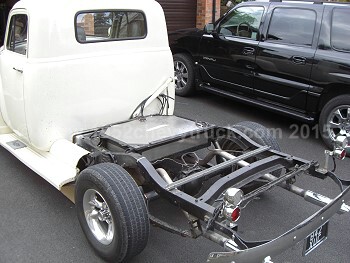
A major problem with an old truck are noises. Creaks and groans from flexing and parts that have possibly not been
assembled properly from previous re-builds. It was decided the whole back end of the truck could be vastly improved
compared to the original 1952 specification by completely decoupling the bed (and everything else) from the chassis
and mounting it on 4 engine mounts. These engine mounts were selected from a Vauxhall Carlton. The bed was removed
and the engine mounts fitted onto the chassis. This involved a very small extension at the back of the chassis. The rear
wings (fenders) were removed. The running boards were also removed. Since the bed was originally bolted to the chassis
some major alterations were needed to maintain rigidity. Indeed, in it’s original 1952 spec. various panels are prone to
cracking due to differential flexing between the bed, the wings and the chassis. These cracks were all welded and
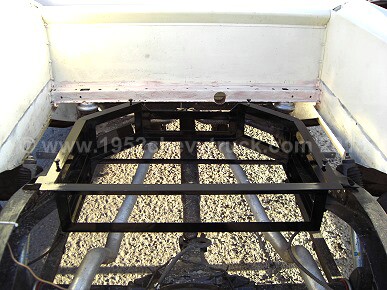
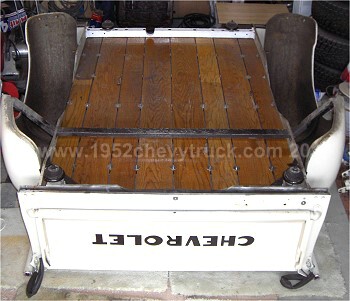
repaired. The corners of the bed were strengthened. The channel that runs along the front of the bed was turned into a
box section and again the front corners were strengthened. The wings (fenders) would normally be supported by the
chassis (again a source of metal fatigue) but two bars were fitted running across, under the bed and joining the rear of
each wing together and the front of each wing together without any connection to the chassis. The rear bar was made of
unequal box and the front bar was a stainless steel tube. The wings were refitted with fender welt. The bed was then fitted
onto the engine mounts and was completely decoupled by rubber. There were no rattles or noises at all from the bed or
wings after all of this was completed. A difficult task was no refit the running boards so that they looked correct. The
bed had been slightly raised and spacers were made to adjust the running boards so they ran from the front to the back
at the correct height and looked correct. Since the fittings to hold the running boards are conceded, making and fitting
spacers was not easy. The wings were originally bolted to the running boards but due to the decoupling, there is now a
small gap instead. The sheet metal filler pieces between the bed and running boards also had a new bracket to the chassis
made so that again they were not connected to the bed. The work on the bed, wings and running boards was completed
by the middle of September 08
2020 Update This bed upgrade in 2008 has proved to be very worthwhile. It achieved everything as expected.
There are many reasons why it is not a good idea to have the fuel tank in the cab. Most revolve around safety.
Suffice to say the smell of petrol in the cab was a common problem. The decision was taken to relocate the fuel tank.
This required a great deal of planning and work. The position of the new tank needed to be decided, the new tank
would be custom made and so needed to be designed. It was necessary to find a company to build it. A cradle for
the tank needed to be designed and fitted. It also needed a filler tube in a discrete location.
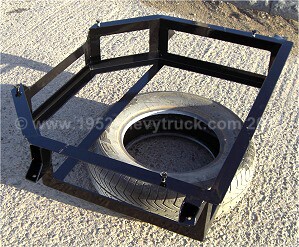
There are a number of places where a fuel tank might be fitted. Chevrolet fitted the tank behind the seat in the
cab. A common place is to fit a new tank is behind the back axle where the spare wheel would go. This option
was discounted for several reasons - Loss of the spare wheel area. - The tank is heavy and this would move the
centre of gravity and a large mass in the overhang behind the rear axle and that is not ideal for weight
distribution and overall handling. - A narrow tank longitudinally under the bed outboard of the chassis. - Here
the tank would be too small to be viable. - Above and at the front of the bed. - This affects the appearance of
the truck. None of these options were attractive. It was therefore decided to go for the most difficult option but
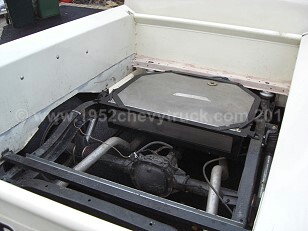
ultimately the best option. Between the chassis rails forward of the rear axle, just forward of the differential but
behind the cab and under the bed. This offered many advantages - Enough space for a 20+ gallon tank. - Low
and in the centre of the truck – the resultant centre of gravity would improve handling. (In the cab the original
tank is only about 10 gallons and is quite high). This final option would be difficult as it must be well clear of
the prop shaft and exhausts and also a 10 mm gap was planned below the bed as the tank would be fitted to the
chassis and the bed is now completely decoupled. It could not touch the bed at all. A tank chassis cradle would
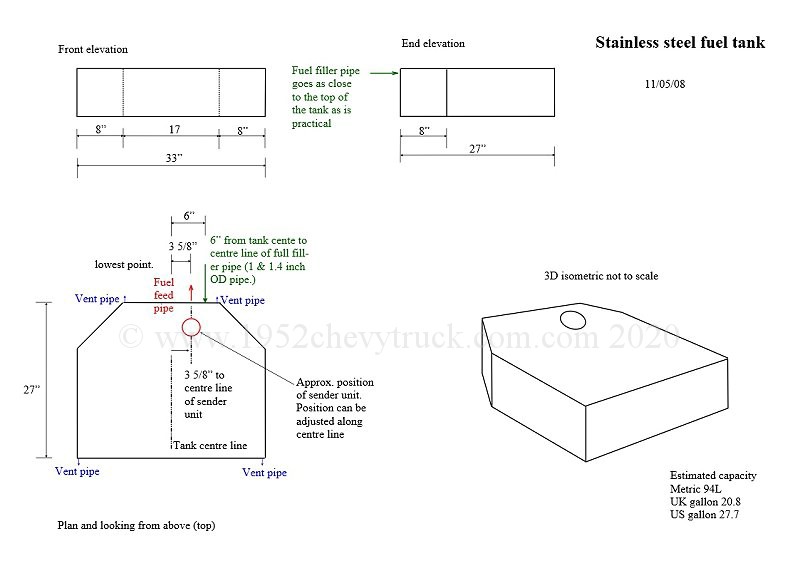
need to be manufactured. It was decided to make the tank 7 inches deep. This would keep it well clear of the
prop and exhaust even taking into account the cradle and the gaps. The shape of the tank was designed to go
between the webbing behind the cab in the chassis to maximise the volume. The tank was commissioned from
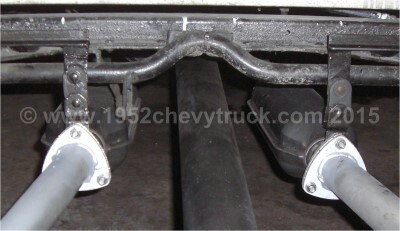
Rick’s Hot Rod Shop in the States. It was built and delivered. The exhaust silencers were moved forward, under
the cab to provide more clearance under the bed. The bump stops on the rear axle were designed to bottom
before the tank came close the prop shaft. Even with two people bouncing up and down on the back bumper,
the clearance to the prop or exhausts was large. Filling the truck with a heavy load was not an option anyway.
The rear springs were designed for optimum performance and handling with an empty bed. The cradle
involved several weeks of design, assessment, modification and manufacture. It was finished on the 3rd October
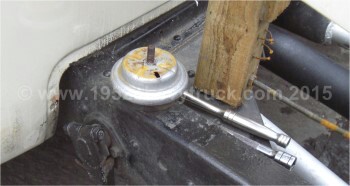
2008. The cradle was fitted, the fuel pipes were all attached and the original cab fuel tank was removed. A filler
pipe was manufactured and this emerged discretely between the bed and the cab. The old filler on the side of the
cab will soon be removed. After a test filling the tank was found to hold 21 UK gallons (95L) (about 28 US gallons).
The original "cab" tank would have held 16 US gallons (60L) to 19 US gallons (19L) depending on what had
been fitted in 1952. it should be noted that fitting the tank in this position does limit how low the truck
can go. If a slammed down truck on air bags is required you can't put the tank in this position. This truck
will not be on an air ride and truck can be quite low for performance purposes but not slammed down.
After designing the tank I contacted "Ricks Tanks" in the USA (www.rickstanks.com) and they built
it (using stainless steel) to my exact designs and shipped it to the UK.
Update 2018 It was interesting some 10 years later while visiting the SEMA show in Las Vegas
in 2018 that I found Ricks Tanks exhibition stand and spoke to the people who had built my
tank 10 years earlier. A very good company.
Update June 09. Tank venting problems.
Removing the bed is now easy.
The bed can be removed along with the wood and wings (fenders) still attached in about 15 minutes. This is because
it sits on 4 engine mounts and these decouple it from the chassis. It is simply a matter of removing the stainless
steel bar that fits under the truck from the front of the left hand rear wing to the front of the right hand rear
wing (4 bolts) and then take off the 4 nuts holding the bed engine mounts to the chassis. 4 people can then go
to each corner of the bed and lift it off. It does not need 4 people due to the weight. Actually two people
could lift it but the size makes it awkward and 4 people are better.
Problems.
The following problems needed to be sorted out.
1. The filler pipe needed to be a little narrower as the distance between the bed and the cab was such
that it tended to rub against the cab.
2. We found that there was not enough venting. The fuel splashed back unless the tank was filled slowly.
3. The cut-out arch in the bed needed to be made a little larger for better access for the flexible pipe
and pipe hose clips between the filler tube and the tank.
1. The filler pipe was removed and put in a vice and "squished" to be an oval shape. This maintained
the same flow volume per second but reduced the width by about 8mm. (38mm to 30mm)
2. When we ordered the tank we asked about venting all 4 corners but was told one 1/4" vent was
all that was required. This was a mistake and we should have insisted on more vents.
Even one 1/4" vent and two 3/16" vents were found to be insufficient and resulted in
long filling times at the pump due to splash back problems.
With three 1/4" vents and two 3/16" vents it was possible to fill the tank at full flow without problems.
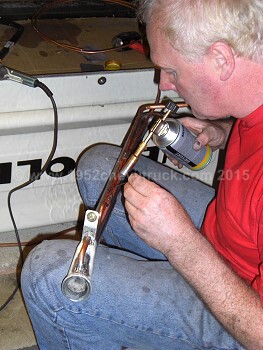
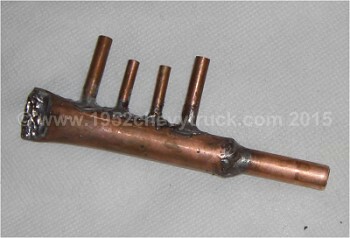
Four of the vents were taken to a vent manifold that was specially constructed to bring them all to one 10mm pipe.
This was brought back and into the top of the filler tube. The fifth pipe was looped round the top of the
filler tube but left open so that air could get into the tank as the fuel was used up.
3. See picture. (See the bottom right picture above)
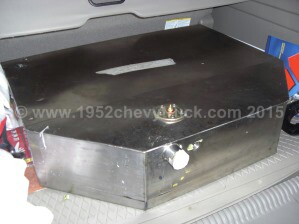
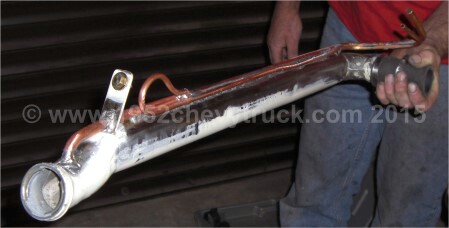
Below you can see the work on the fuel tank filler pipe, the manifold that joins the vents together and the
whole unit now fitted for testing. It still needs to be removed and re-painted.
You may also notice that the filler tube is now narrower.
Update 2017 The fuel tank filler and venting was better but still not perfect. In March 2017 the
bed was removed and the filler tube again modified and more work was done on the venting.
Important Venting Update April 2023
This venting requirement depends on whether you have a vented fuel filler cap or an unvented one.
A vented cap would mean if the truck was to roll over, the fuel would spill out.
If it is unvented that means there could be a sealed system and air can not get into the tank to replace used fuel.
This would result in a partial vacuum in the tank making the fuel pump work harder and also could stress the tank.
When this happens, removing the filler cap while refuelling would result in a suction sound coming from the tank.
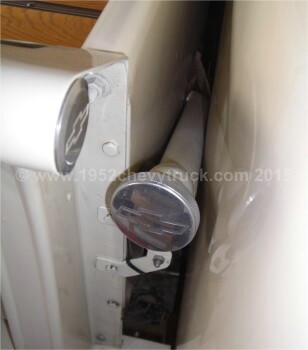
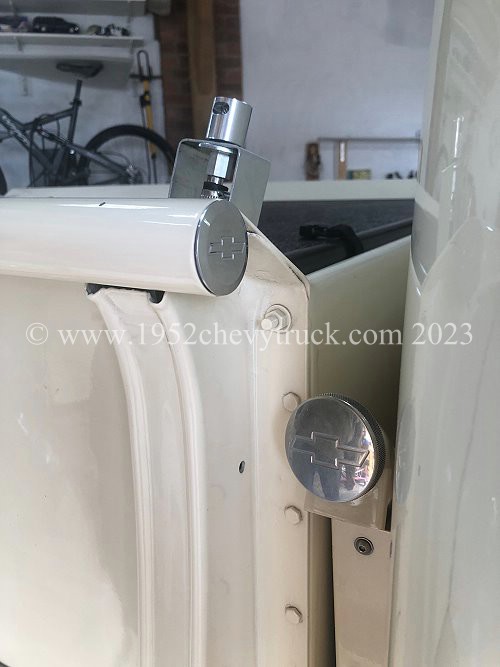
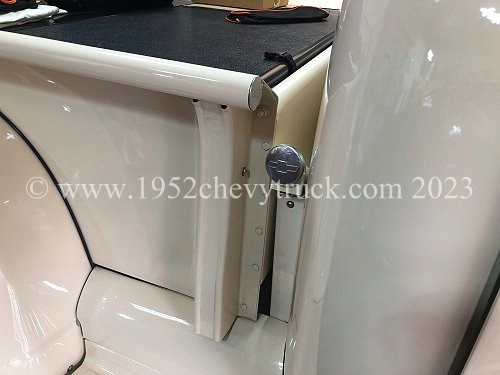
The solution is a vent with roll over protection. The ideal place for this vent is in one of the stake holders.
It needs to be fitted above the top of the filler tube (unless you use an alternative type). The type chosen
was the "Holley Sniper EFI Remote Mount Vent Valves 19-174." at Ł23 from Summit Racing but widely available.
This seems to be identical to the "Tanks Inc. Remote Rollover Vent Valves VVR."Both of these need to be higher than the
top of the filler tube (although the 2 part system "Tanks Inc. Remote Rollover Vent Valves VVR-IL." can be positioned
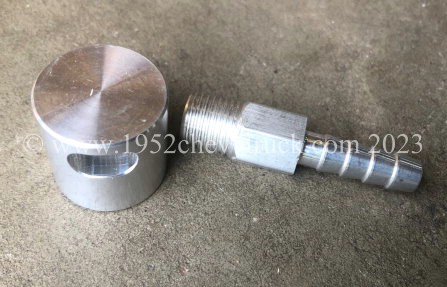
at any height). I had a spare (plugged) vent pipe on both sides of the truck and so an 8mm "barb" coupler was used
to extend the fuel hose. 2m of (E10 compatible) fuel hose was purchased from eBay with an ID of 8mm. This would be
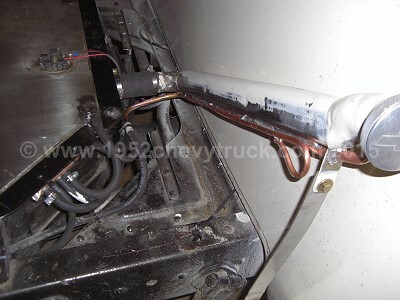
connected to the new vent valve. The chosen location for the vent valve was near the top of the front right
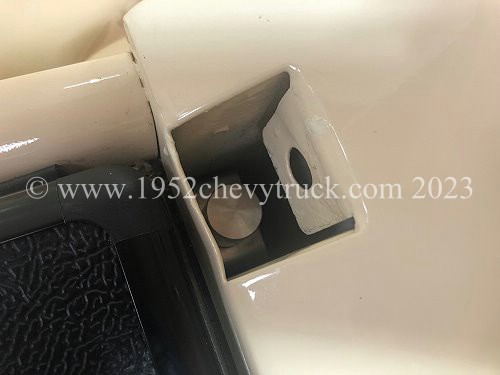
"stake holder" next to the filler tube. It was necessary to make a bracket and this was made using aluminium.
As usual, existing factory holes were used to mount the bracket as drilling holes in the truck is always avoided.
It was necessary, however, to put a hole in the right hand "apron" at the bottom of the stake holder. This was
done from below and this hole is hidden. It can't be seen from the side of the truck. The hose is also hidden.
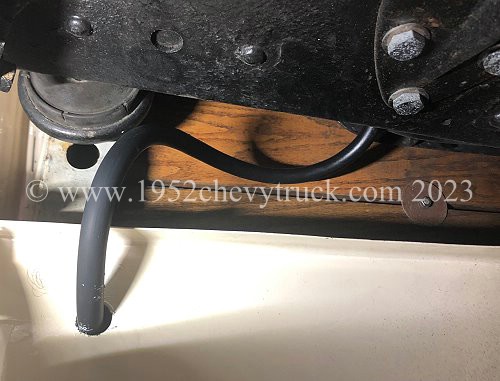
The theory behind the vent valve is interesting. In normal use, the vent is 2-way. It allows air into the tank
to replace used fuel and, in addition, it assists in taking air out of the top of the tank while filling. This
reduces the possibility of splash back while filling. In the event of a roll over, in the inverted position
a ball stops the fuel from coming out. The pictures show the location, the pipes, the bracket and the vent.
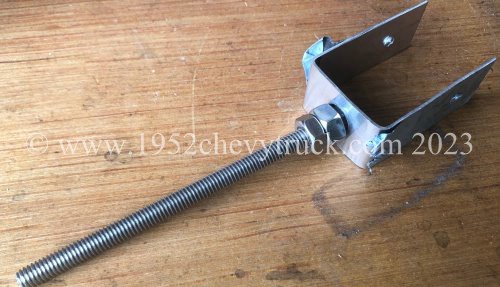
Above left the Holley VVR. Above right the bracket made for the vent. Notice a bolt was used to hold it while measuring.
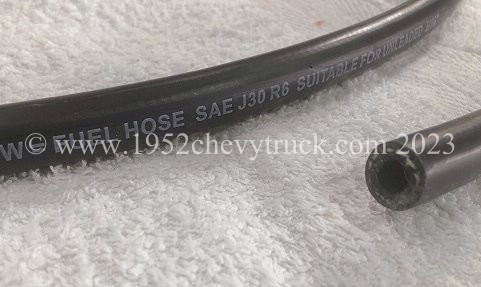
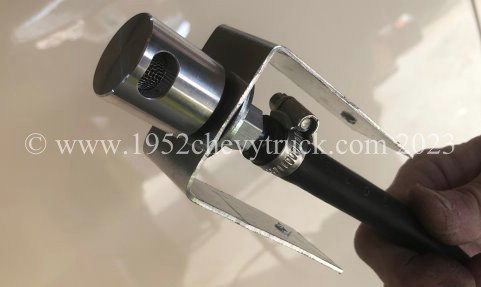
Above left the 8mm ID reinforced E10 fuel hose. Above right the assembled bracket. 9.5mm - 12mm geniune SS Jubilee clips.
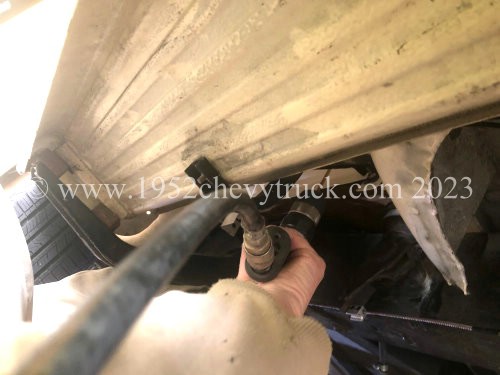
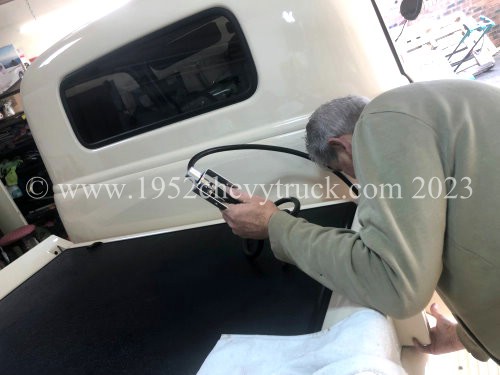
Above left dirilling the hole through the apron. Above right feeding the assembed bracket through the stake holder.
Above left feeding the bracket through. Above right feeding the bracket through.
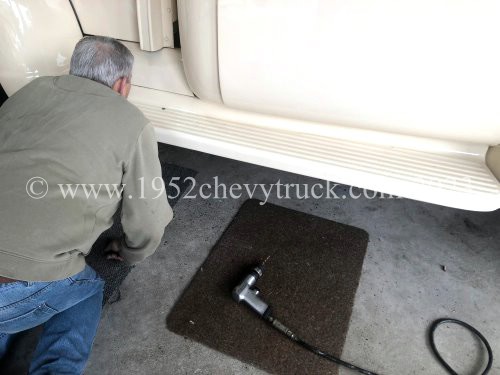
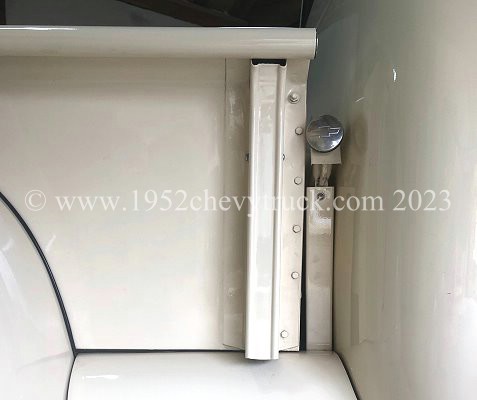
Above left the hole in the apron and the hose through the hole can't be seen. Above right job finished.
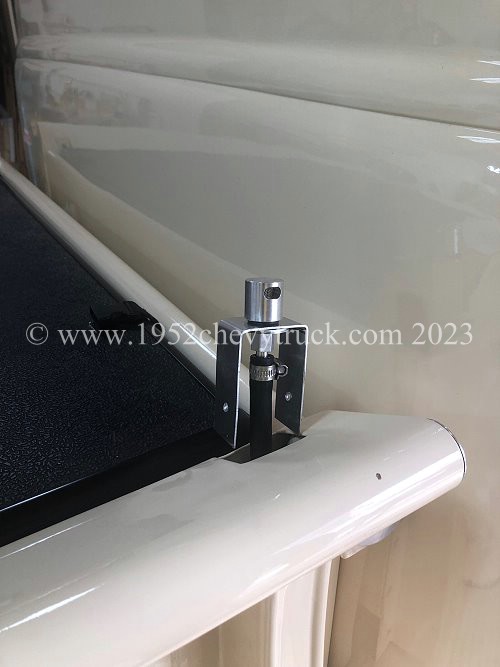
Above left vent is hidden in the stake holder but is above the top of the filler tube. Above right job finished.
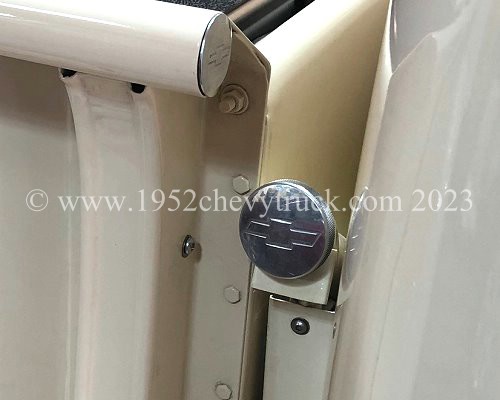
Above left you can see the bracket is held by a self-tapping screw on each side of the stake holder. Using the factory
clearance hole the self-tapping screw screws into the bracket. Above right job finished.
Above since there is another spare plugged vent fuel hose coming from the other side of the top of the tank
we may fit a second vent in the left front stake holder.
Update 2017 - This update included a much better fuel sender unit.
See the fuel tank upgrade. (March 2017)
Update 2018 - A safer and better fuel filter and shut off valve.
A fuel filter in the engine bay, often above the manifold is not a good idea. It can be a source of leaks and
a fire hazard. Far better to put the filter under the truck. Indeed this is where the filter is in many modern
vehicles including my wife's Mercury Grand Marquis. The chosen spot was on the chassis frame, under
the running boards, more or less lined up with the passenger door. A quality filter was purchased from
Speedway Motors (Part number 10102 $29.99) and a shut off valve was found locally.
Also see the fuel filter update and flexible pipes update in 2021 below.
Update 2021 - Filter update and E10 fuel pipes.
Also see the fuel filter update in 2018 above.
In the Spring of 2021 the UK government changed the names of the fuel and the fuel in our pumps.
Normal 95 octane "Unleaded" was changed to "E10 Unleaded". This now has a 10% ethanol content.
Higher 97 octane "Premium Unleaded" had it's name changed to "E5 Unleaded" but the fuel itself
which already had a 5% ethanol content did not change. Older cars needed to use this E5 unleaded
or upgrade their fuel system. This truck already had many E10 compatible features. It had a
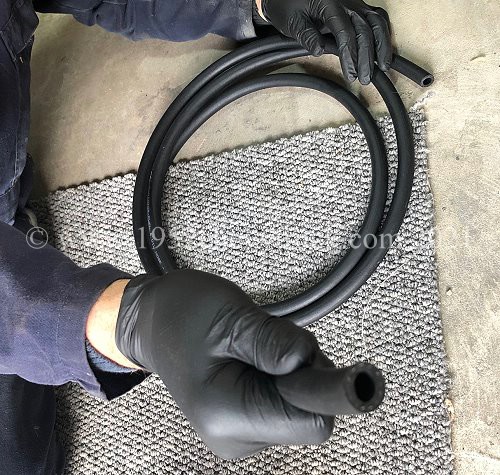
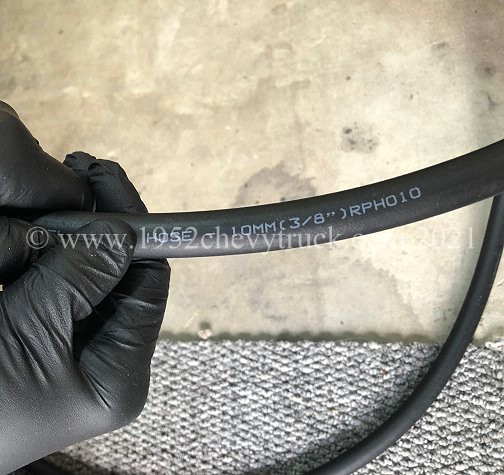
stainless steel fuel tank and copper hard line pipes. The flexible rubber pipes needed to be
upgraded. That meant upgrading the normal rubber pipes and the stainless steel braided rubber
pipes under the hood. Since these pipes were to be upgraded, it made sense to do a further
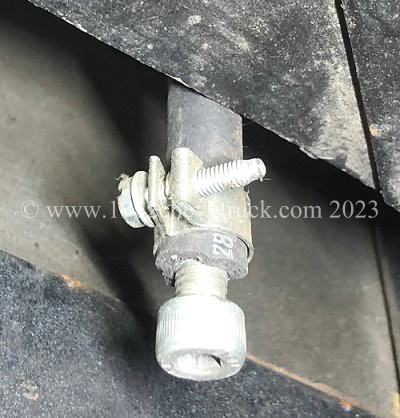
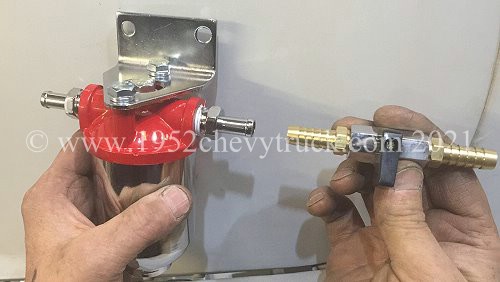
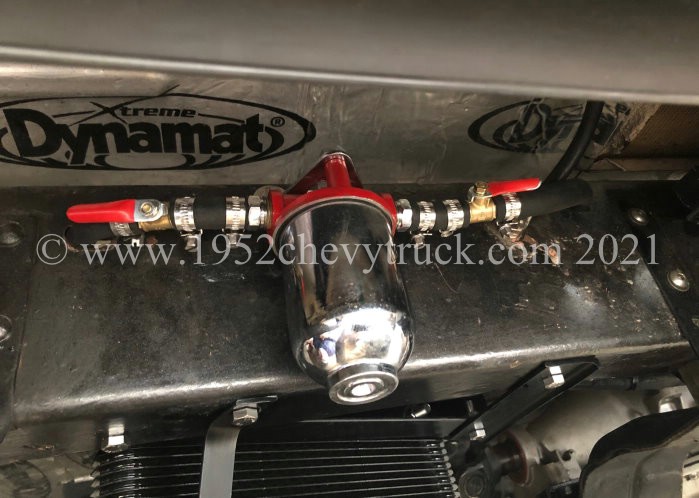
upgrade on the fuel filter. Here it was decided to put shut off taps on both sides of the
filter so that the tank and the forward pipes could be isolated.
More information about the fuel filter (from Speedway Motors) is above.
The shut-off taps came from Amazon and were about Ł5.00 each ($7.00)
The picture below shows the new I.D. 3/8" braided stainless steel (100 series) hose O.D. 5/8"
(1.0m ebay at Ł16.50 - about $20.00)
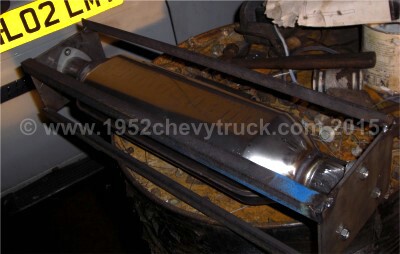
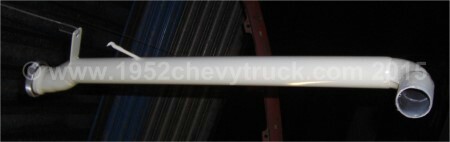
This work was done in Nov and Dec 08. The “Cherry Bomb” mufflers sounded great “round the doors” but on
longer trips they were too loud especially on the motorway. Indeed trying to talk or listen to the radio was
almost impossible while cruising at 70 mph. I contacted Speedway Motors to talk about the various types of
performance mufflers that were available. In particular, were there any that kept women happy? They said that
the Flowmaster range all tended to be quite noisy but the Flowmaster Hushpower stainless steel units had
resulted in good feedback from female sources. An order was placed. It was decided to use stainless steel
exhaust flanges to convert the full exhaust system into 3 sections. Front pipes, silencers and rear pipes. This
meant that each section was easily manageable and the cherry bombs could be re-instated, if required, by
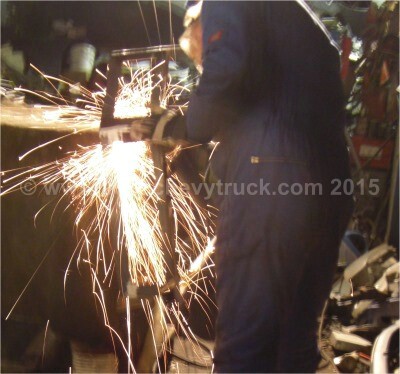
simply taking off a few stainless steel bolts. The flanges were made by a local company using the Vauxhall
flange system as a pattern. This meant the triangular gaskets were available locally. Enough flanges were
ordered for the pipe ends, the Hushpower mufflers and the cheery bomb mufflers.
Flanges were also fitted to the cherry bombs (also built in the jig) and they were put in storage.
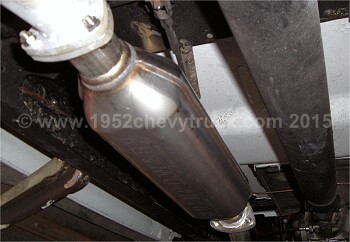
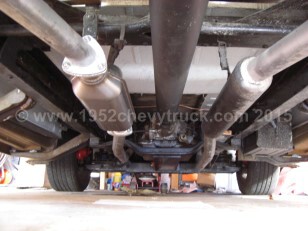
The final exhaust sound was much quieter but the sound of the V 8 was maintained with a good throaty tone.
Being performance units they were not as quiet as modern silencers on new cars. Were they quiet enough to
keep women happy? Perhaps some - but not my wife! So what’s new about that ? !!
Update 2011. See the final exhaust system upgrade (Feb 2011)
Nore - this exhaust system and "Walker Quite-Flow 3" mufflers still works perfectly and sounds great in 2022.
Update 2015 Sanderson header manifolds designed for the 1947-53 Chevy truck fitted.
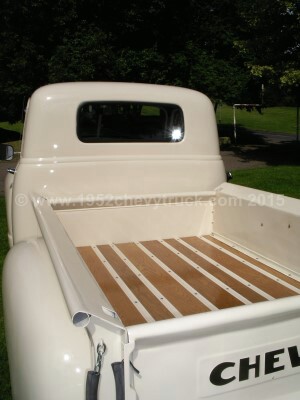
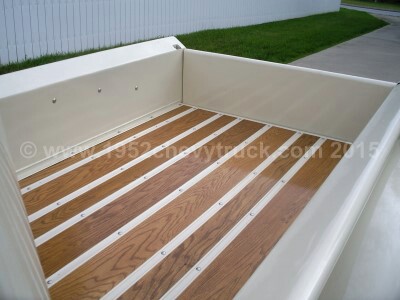
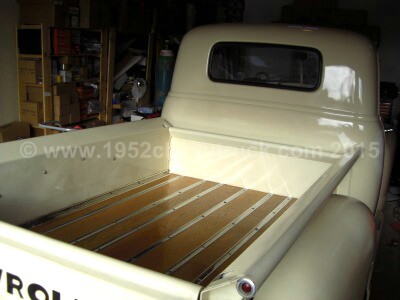
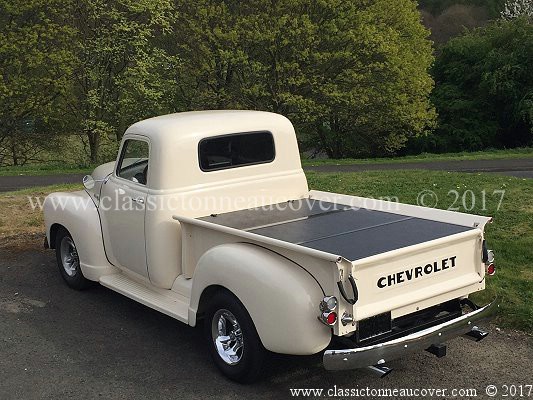
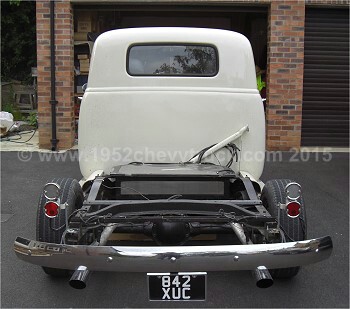
The right hand pictures above were taken in June 2007 in the States at the time of purchase. The left
hand one in the UK - Aug 2007. After fitting the fuel tank and exhaust silencers, the bed was
re-fitted with new stainless steel rails (from Jim Carter truck parts) shown below in Nov. 2008.