The aims, the chosen performance transmission builder and the selected transmission.
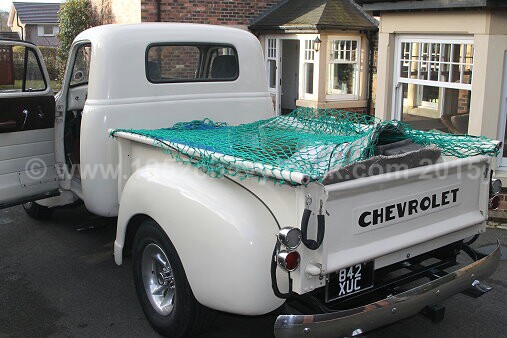
The transmission in the truck when first purchased in 2007 was a TH350 three speed box. It was always the intention to change
it to a four speed. Since the main aim of this project is to produce a historic vehicle capable of long distances at high speeds
in comfort, a three speed transmission is not ideal at it revs too high at 70mph on the motorway. There are, however, three other
disadvantages of a 3 speed box, increased engine wear, increased fuel consumption and increased noise.
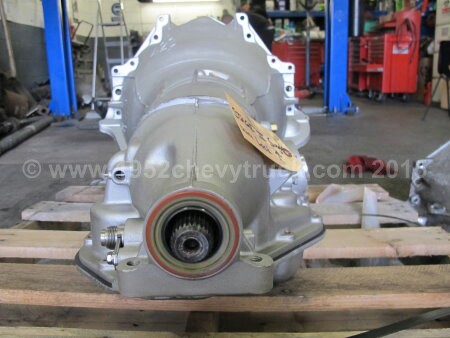
A four speed transmission with overdrive was required. In addition, a performance four speed capable of taking substantial horse
power would mean a more powerful engine could be fitted later. After much research, checking transmission builders but most
importantly also checking feedback on forums from the builders customers it was decided to buy a TH2004R four speed
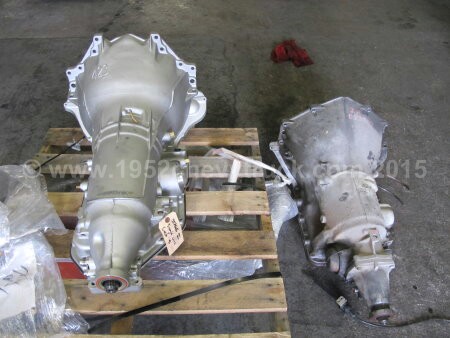
transmission and torque converter from Extreme Automatics in Ohio USA.
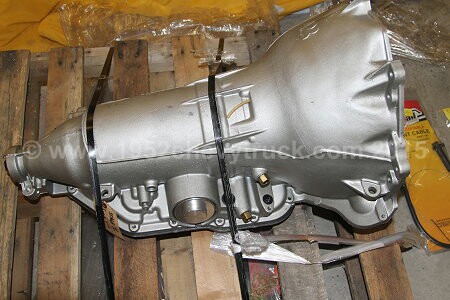
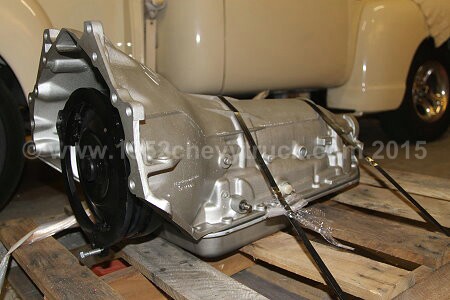
The transmission comes with a torque converter installed. The selected "stage 2" transmission will take 750hp, more than
enough for any future engine. I don't remember the exact cost and it may have changed since purchase but it was about $2500 for the
transmission, torque converter, and the extras listed below. The customer feedback which really impressed me from this company came
in two forms. The first was how helpful they were after a sale with technical assistance and secondly comments like, "no matter how
hard I try, I can't break this transmission"! A marked contrast to feedback comments for other builders. It is certainly not my aim
to try to break a transmission but if customers who race with this transmission find them bullet proof that is good enough for me.
"Lonnie" is the owner and his businesses seems to have pioneered the development of the 200-4R transmission as a performance unit in
preference to the 700R4 and others. The 200-4R has the additional advantage of being (almost) a drop in replacement for the 350 since
it is the same length and so the prop-shaft does not need shortening (not that shortening the prop-shaft is a big deal as
specialist companies can do that in a couple of hours - more about that later).
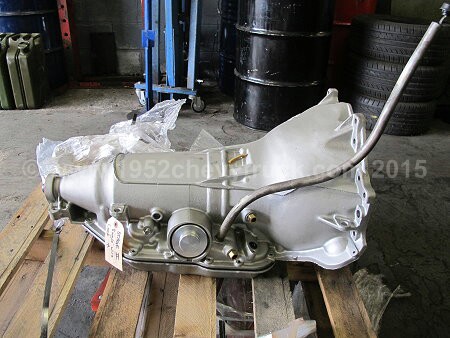
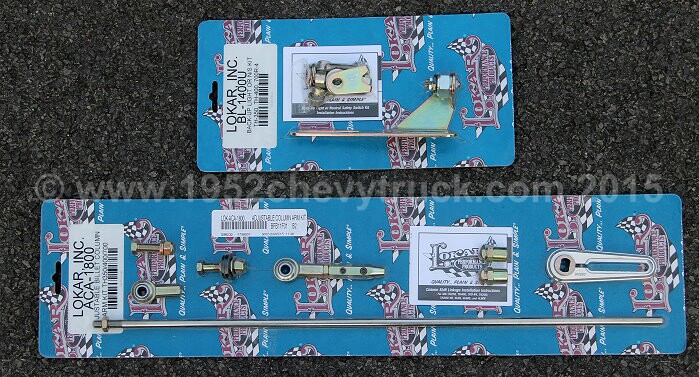
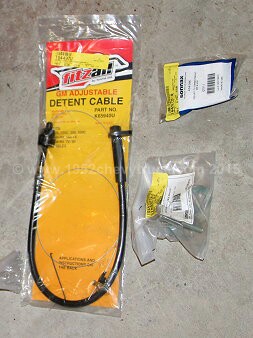
When ordering a new transmission it it a good idea to also order:
A torque converter.
A dipstick and a dipstick tube.
A rubber support mount if the one on the old transmission is not in good shape.
A plastic cover to go between the new transmission and the flywheel as the bolt pattern at the transmission end is different
between a 350 and a 200-4R.
You may also need a special shift linkage nut. More about that later but this special nut does not come from the transmission builder.
Or it may be you just need a standard metric nut.
Extreme Automatics should also send you a TV cable and some brackets associated with it as this is needed for their 200-4R.
You also need some good transmission fluid. More about that later.
Shipping the transmission from the States.
The transmission was ordered in Dec. 2013 and shipped out of the States by my shipping agent in Feb. 2014 by sea on a pallet.
My agent is in Pomona, California and he is from the North East of England (he is a "Geordie"). My friends from the North East
American Car Club know him well and he looks after us. The transmission arrived in the UK a couple of months later and has been
in my garage ever since. Due to other commitments I am only now (March 2015) getting round to fitting it.
My Mechanic.
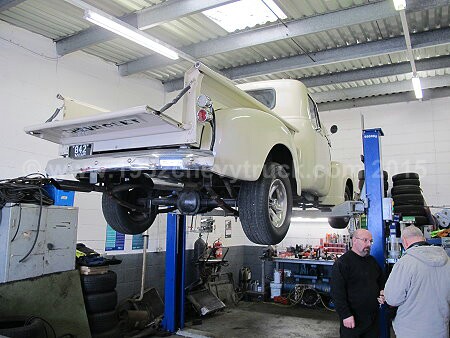
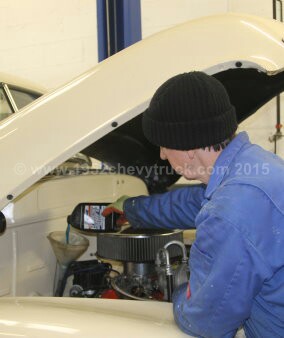
I took the truck with the transmission on the bed along to a friends garage "Cruise Motor Services" in Gateshead. Tel. 0191 460 4143
Keith, the owner, regularly works on American cars and is in our car club. He also has a 2 poster lift which can take 4000Kg. Ideal
for American cars and trucks. If you are buying a transmission from a performance transmission builder, it is a very good idea to read
through the tech sheet on that model of transmission from their website (a pdf) before you start the installation process.
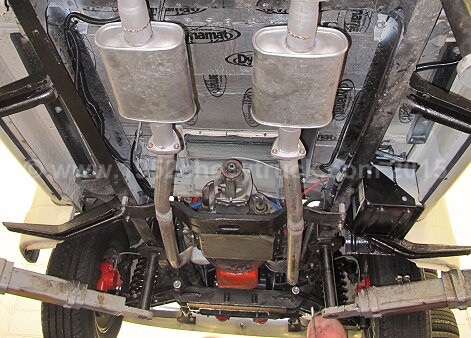
Removing the old transmission and preparations.
The transmission may have been shipped with transmissions fluid inside from the Dyno testing or it may have been drained before
shipping. Either way make sure it is empty and don't fill it as it needs to be empty when you do the setting up. More about that later.
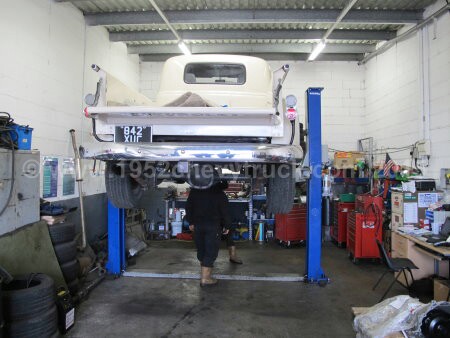
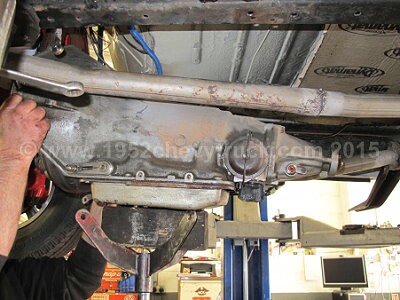
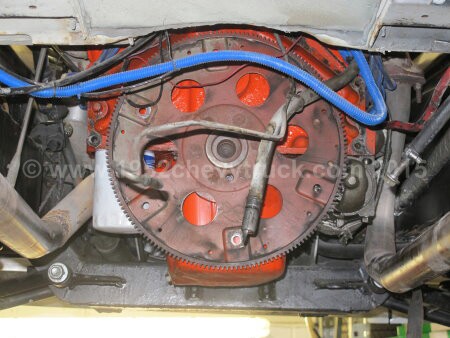
Before lifting the truck the dipstick was removed from the engine bay. The truck was then put on the two poster lift and the
Turbo TH350 transmission was removed.
In detail:
The prop shaft was removed. (In English terms the words "drive shaft" is restricted to transverse shafts only and a longitudinal
drive shaft is called a "prop shaft". Different terminology may be used elsewhere).
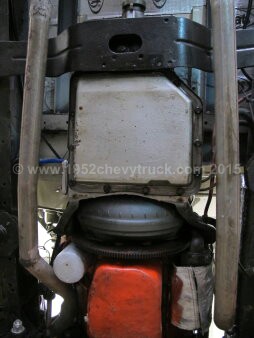
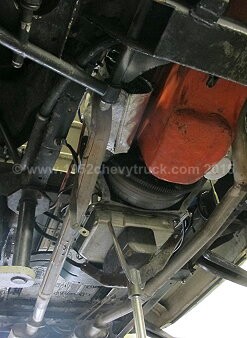
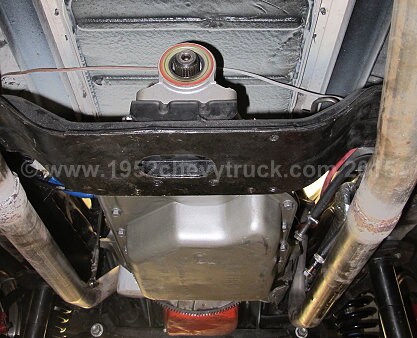
The transmission support mount was removed. That is the metal support which spans across the chassis rails (frame rails).
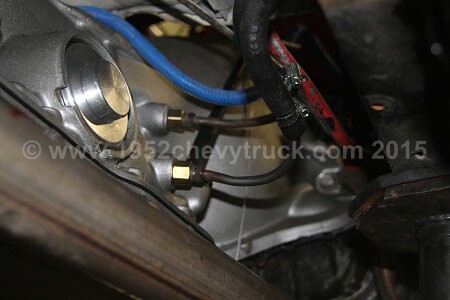
The two (in and out) transmission oil cooler pipes were removed.
The shift linkage was removed.
The vacuum pipe going into the side of the TH350 was removed.
The kick down cable between the transmission and the carburetor was removed.
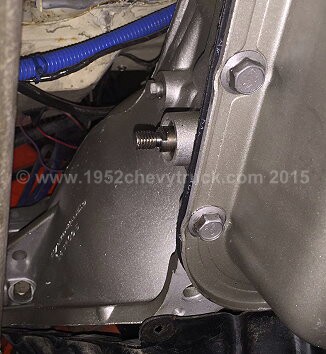
The dipstick tube was lifted out and lowered. It is just a push fit and can be lifted out from below while the vehicle is
still on the ramps.
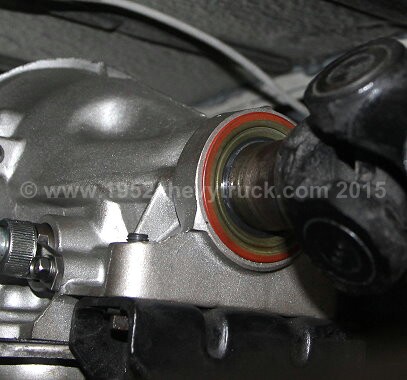
The plastic cover between the transmission and the flywheel was removed.
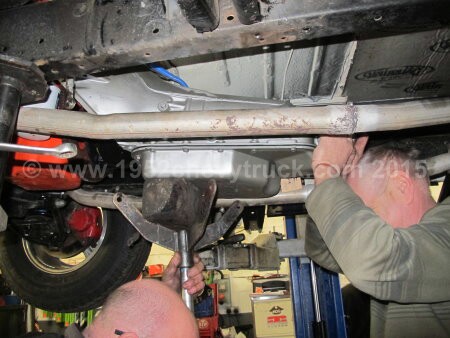
At this point a transmission support jack was put under the transmission and the 6 bolts holding it to the engine were removed.
It was then lowered and moved.
At this point the rubber mount can be taken off the old transmission to transfer to the new one or leave it on if you have ordered
a new mount.
Before fitting the new transmission the vacuum pipe can be completely removed as it is not used with a 200-4R.
Fitting the new transmission.
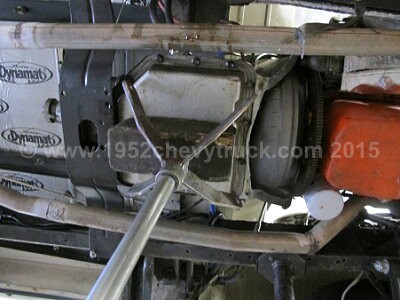
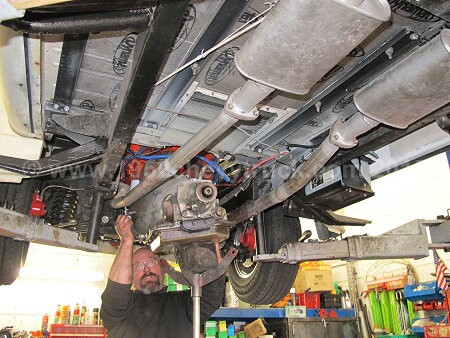
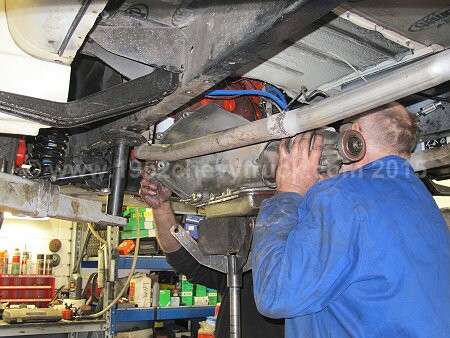
The new transmission was put onto the transmission lift jack and held in position while the 6 bolts were re-located and tightened.
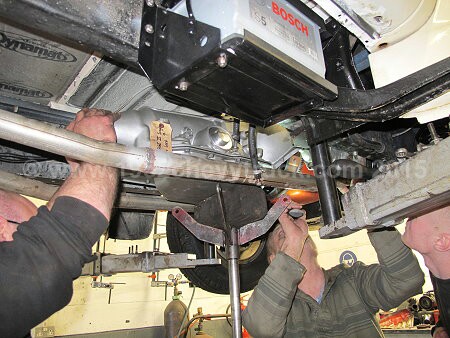
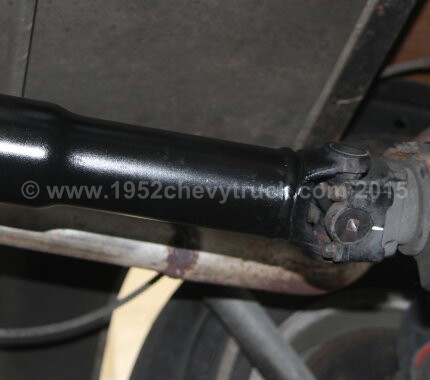
Changing from a 350 to a 200-4R needs the rear support mount moving rearwards. New holes need to be drilled into the chassis
rails and the support re-located in the new position. The oil cooler pipes can be reconnected. There is nothing to change here
as the "in" and "out" fittings on the new transmission are in the same place. It was at this point that we had a problem with the
prop shaft but this was caused by a previous modification to the truck. Some time ago, when the engine was out and the firewall
was being restored (see previously on site) when the engine was refitted it was also moved backwards. I don't remember the exact
details but I think it was because the old "propeller" cooling fan was removed and more room was needed for the electric fan. The
engine may have been moved back about 25mm (an inch). That resulted in almost full engagement of the prop shaft. (I was told by
the prop shaft specialists the engagement should be about 2/3rds). What this refers to is - the amount of spline which is inserted
into the back of the transmission. In this case most of it was inserted and only about 5mm was not engaged. I did not measure the
length of the two transmissions. It may be that the 200-4R was a few millimetres longer. All I know is it was now tight. So tight
Keith said he would not want to drive the truck with the prop shaft as tight at that. It may be if he had forced it in and tightened
the bolts it would have gone back to the 5mm of spline showing but he did not try. I decided to have the prop shaft shortened.
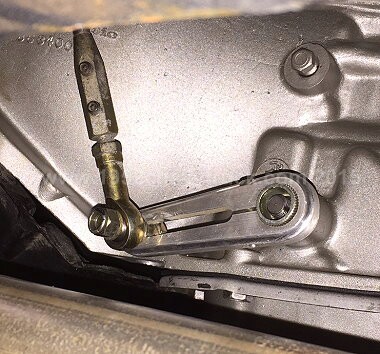
The second problem we had was with the nut required to fix the shift lever onto the new transmission. The nut on the 350 had been
imperial and the tread on the new transmission was metric. Also it was a special nut to secure the linkage. If this had been a normal
car or truck, the manufactures linkage could have been fitted with a standard 10mm nut but not this linkage. A 1952 Chevy truck
originally had a straight 6 engine and a manual transmission in. 1952 therefore like many other modified vehicles, hotrods etc. the
shift linkage is after-market. After a few hours of research online it was identified as the Lokar shift linkage and this kit uses two
special nuts. One with a special imperial 3/8th inch thread (e.g. For the 350) and also a special metric 10mm nut (e.g. For the 200-4R).
This special nut goes into a sort of metal cup and there is no way of using a standard nut. There seemed to be no option to just buy
the nut and so the Lokar shift linkage kit was ordered from Summit Racing for $61.00 At the same time I decided to buy
the park / drive ignition inhibitor kit.
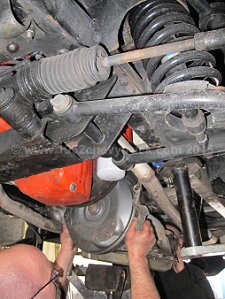
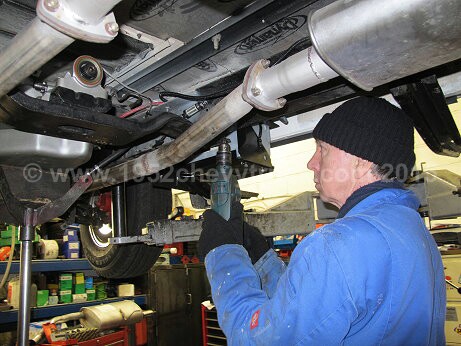
Returning to the prop shaft problem, we have a local company called Commercial Prop Shaft Services Ltd. (CPS) on the Gateshead
Trading Estate. I remember when they were called "Carruthers" and they were in Dunston. (Named after the owner). They started in 1976
and I had not visited them since they left Dunston. At this point it was 6.00pm on a Friday. We had started at 2.00pm and had been
working for 4 hours. I decided I would sort out the prop shaft the next morning as CPS were open from 8.00 till 12.00 on a Saturday.
I put the prop shaft in the back of my car. The next morning I was at CPS at 8.15am. I told them I had not been there since they were
in Dunston and they said they had moved 10 years ago. Time flies! They needed the exact dimension from the dip in one of the cups at the
coupling end (forwards of the differential) to the seal on the back of the transmission. After a call to Keith that was provided. I was
then told to come back in 2 and 1/2 hours. On returning it was not only shortened, it was also painted. Price �48.00 + VAT. (About $90).
I took it straight to Keith's garage and it wad fitted. The engagement was found to be 2/3rds. CPS had done a good job. (I did not
measure the length of the spine but an estimate would be about 90mm. There was now about 30mm showing, i.e. not engaged. This is a
little over an inch). Since changing the prop shaft is not needed when going from a 350 to a th200-4R transmission, you may wonder
why I included this detail here. Two reasons. The first it to show that making changes to a prop shaft is not a big deal. 2 to 3 hours
on a Saturday morning sorted out this one. Secondly this site deals with all aspect and problems encountered in this project
and how the problems were solved.
 . . . . . . . . . .
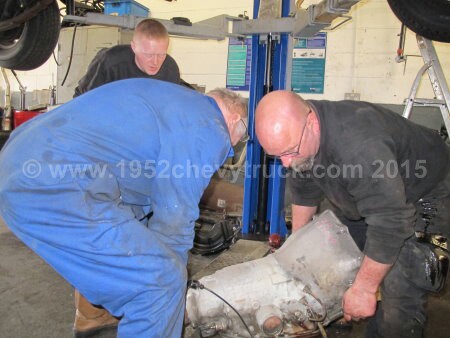
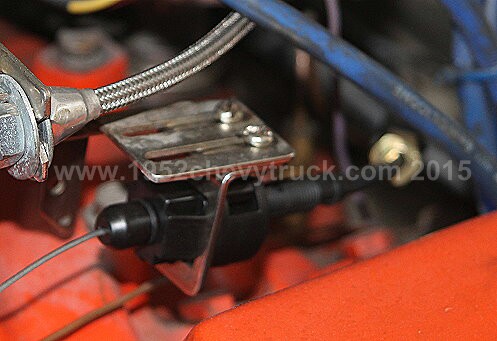
That same morning we continued the work. The TV (or detent) cable needed setting up. The transmission sump pan was taken off
the bottom of the transmission. The lifter/plunger assembly was located and the cable attached and routed through to the
carburetor. It is best to refer to the tech sheet at this point but this adjustment was not difficult.


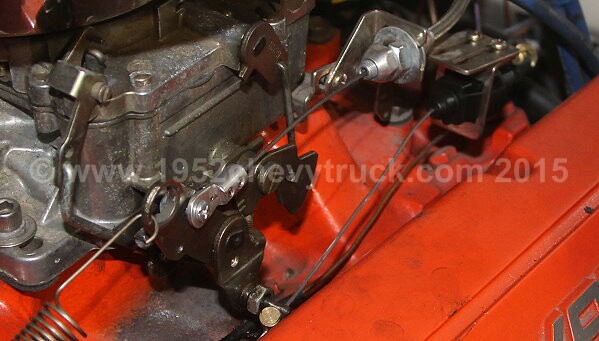
The TV cable was attached to the carburetor linkage where the kick down cable used to be. Did not need the extra brackets supplied with the
TV cable. Just used the existing bracket which was originally for the kick down cable. The end of the TV cable was the same and fitted into
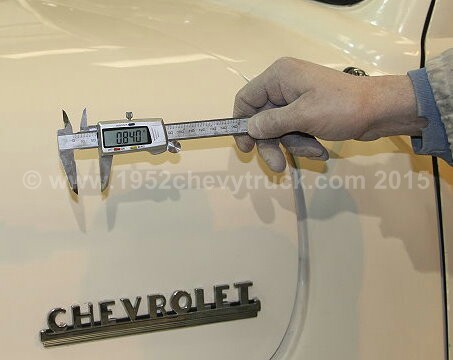
the existing bracket. The cable went through the hole previously used for the kick down cable. With the throttle wide open (accelerator pedal
on the floor ... "pedal to metal", the piston of the plunger needed to be fully pushed in. With the throttle on idle (tick over) and the
accelerator pedal fully up, the plunger needed to be out by 8.4 inches. In both cases there should be no slack in the cable. With the cable
attached to the kick down hole in the carb linkage we found we had exactly 0.84 inches! This was measured using a digital readout vernier
caliper. The caliper was opened to 0.84 inches and held against the plunger. Whether we were lucky I don't know but it was exactly right.
If it had not been correct, the adjustment would have been more difficult. E.g. an incorrect range might have been 0.8 inches or 0.9 inches.
This now needs some explanation. No amount of moving the cable along it's length can alter this range dimension. The geometry of the linkage
would need to be altered. The hole which the cable hooks into needs to be either closer or further away from the point of linkage rotation.
An analogy would be to think about a door being opened or closed. If you push the door in the middle of the door, your hand moves a short
distance to close it. If you push the outside of the door near the handle, (twice the distance from the hinge. The hinge is the point of rotation),
your hand moves a longer distance. If the plunger had moved in 0.9 inches, a hole for the cable would have been drilled in the throttle
linkage closer to the point of rotation. If 0.8 inches the problem would have been worse as the linkage would not have been long enough
for the hole to be further away from the point of rotation. Were we lucky or was it in some way by design? I don't know. Probably lucky.
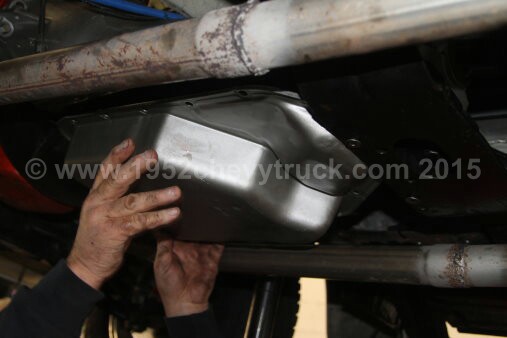
The next step was to re-fit the sump pan and fill the transmission with fluid. This is done by filling down the dip stick tube using a funnel.
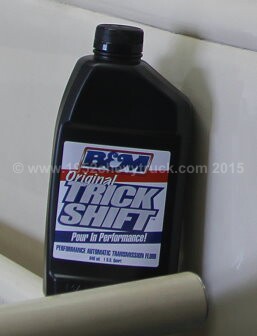
Now to return to the type of fluid. Extreme Automatics say you can use any type of fluid but the tech sheet makes some recommendations for
quality fluids. Lonnie said in an email he preferred "B & H Trick Shift" but that he did not know if it was available in the UK. After some
searching online I found that "Real Steel" in the UK did indeed have it in stock. It was �5.29 per quart and �12.00 delivery
or �64.90 for 10 quarts including delivery and VAT. (About $95). It took between 8 and 9 quarts to fill the transmission, the torque
converter, the oil cooler and associated pipes and an extra quart was included for future topping up. That is 10 quarts. This may seem
quite expensive but if you want to look after your performance transmission good oil is an investment. If you look at customer feedback
online you will find many people are "singing the praises" of Trick Shift. After filling with fluid, the engine was fired up (still on the lift)
and while holding down the break pedal, gears were selected. The truck was still clear of the floor on the 2 poster and so by slowly lifting
then depressing the break pedal carefully the drive and reverse gears were tested. Keith had to hold the linkage onto the transmission while
I changed gear as we still had no special nut. That was a bit awkward but we managed. It was decided to start by putting the transmission
into "Park" at the transmission and also the shift gear lever on the steering column into "Park" as well, then adjust the linkage to suit. This
was followed by making adjustments were necessary. The fluid level was rechecked and topped up once the transmission was warmed up.
Update 2016 Very Important.
A long page full on information about how to set up the TV Dent cable
with your carburetor including pedal adjustments etc. is now available
and it is important you read and study it, Go to the
carburetor / transmission set up page.
Here the carburetor was upgraded to a Street Demon but the principle
is the same with all carburetors
Pressure testing.
It is worth noting that I sent Lonnie a technical question via email on that Saturday morning, not expecting an answer until Monday since
his hours were Monday to Friday. I had an answer within 1/2 an hour! That is what I call excellent after-sales support. The question was
about the references to pressure testing on the tech sheet. The tech sheet makes it clear that an additional worthwhile check is to do a
set of pressure tests. We did not have any pressure testing equipment. In addition, the sheets refer to needing a 6 foot long pressure pipe
with an 1/8 NPT connector on the end. It seemed unlikely that any local company would have this pipe but it could be made up
by "Pirtek" on the Team Valley Trading Est. who specialise in making up high pressure hoses.
A company called "Austin Engineering" was recommended to me to do the testing. Indeed this company was highly recommended. I rang
them and found myself talking to one of the partners. From this point onwards things did not go very well. He was not in any way
unpleasant but it seemed like he had his own agenda rather than listening and he also gave me a "I'm too busy to talk to you" impression
as well. He said that they preferred to pressure test before the transmission was fitted. Ignoring all of that I explained that I was
sure he was right as far as many types of transmission are concerned but I had read the tech sheet and in this case the transmission
must be set up and connected to the carburetor by the TV cable and so must be tested in situ. I did not get a chance to talk about
sourcing a connecting hose. His next comment was that his partner was more technical than him but was not in today and I needed to
ring back the next morning. He then stated "they would then decide if it was something the wanted to get involved with". At that
point I decided this was not a company I was going to take my transmission to. I may be doing them an injustice as the
other partner may have been very helpful.
This is when I sent the email to Lonnie. He said that as long as I was confident the plunger movement was 0.84mm the pressure
testing would not be needed. (It is possible Pirtek might do pressure testing but I have not looked into that possibility)
The previous owner of Austin Engineering had been in the business for many years and I am told he was very capable and the sort
of person who would, quote, "do anything for anyone", or "go the extra mile" for his customers. Unfortunately he died some time
ago. I am not a transmission specialist, I a not even a mechanic, but if I can figure it all out (with the help of my mechanic)
why would a specialist transmission company not want to get involved if you were paying them for their time?
That completed the setting up work on that Saturday morning. A longer delay was caused by the special Lokar 10mm bolt which was
ordered from the States, however, I had to leave the country on business for a week and when I returned the Lokar kit was waiting
for me. Returning to Keith's garage where the truck had been stored, the special 10mm nut was fitted. Further tests were done
and the transmission flued level checked again. The truck was then taken out for a test drive.
More about this later. Watch this space.
Update 2018.
Real Steel no longer sell trick shift and importing it into the UK by air is not possible.
If anyone has anything coming in by ship, have some put in the container.
Update 2018.
The best way to pressure test the system is to fit your own pressure gauge under
the dash. Go to the carburetor / transmission set up page.
and scroll down to find details on how to do this.
Update July / Aug 2015
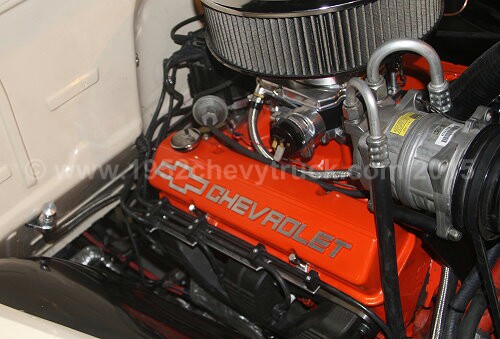
You will see on the engine performance updrade page, a new carburetor has being fitted and this has a new purpose built
bracket for the 200R4 transmission Dent Cable. This bracket is designed to provide the exact amount of pull on the transmission
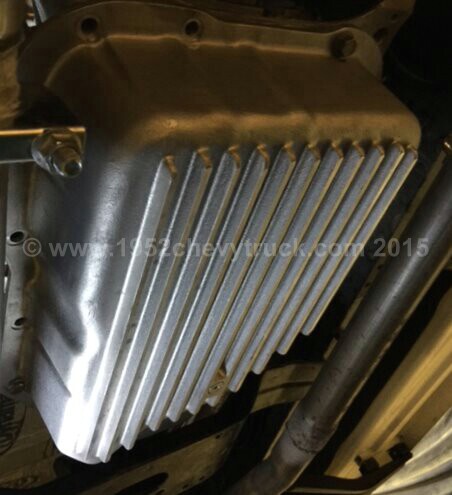
piston to change the gears at the correct time. In addition a heavy duty deep finned aluminium sump has been added.
This resulted in an extra two quarts of "B&M Trick Shift" transmission fluid being needed.
The pan came from Extreme Automatics and although it does not have the "Hughes" name on it, they say it comes
out of the same factory. Hughes have a good reputation for high quality transmission pans.
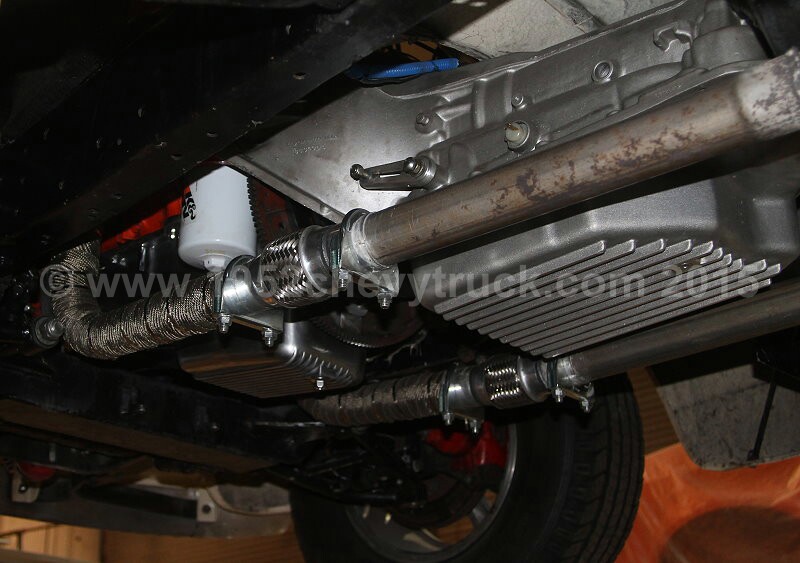
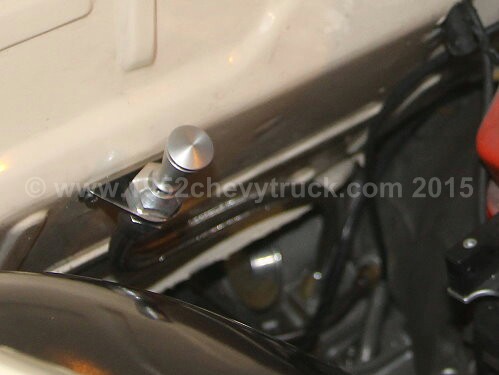
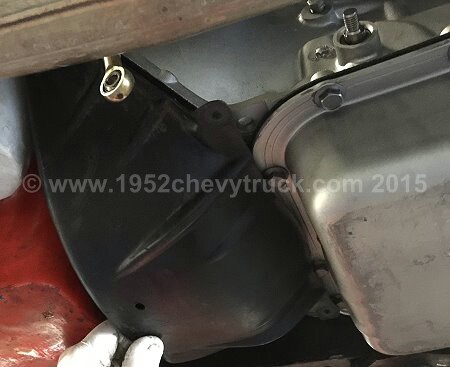
The Lokar flexible dipstick designed for the 200R4 transmission was fitted low on the firewall and is perfectly placed for access and filling.